Crispy, Buttery, Ranch Perfection: Your New Favorite Chicken Recipe
This Crispy Buttered Ranch Chicken offers an effortless path to a flavor-packed, deliciously crispy weeknight meal, minimizing prep time without compromising taste.
Achieving that signature golden crunch and savory ranch seasoning requires only 6 pantry-friendly ingredients and bakes completely in 30 minutes for perfectly tender chicken.
This versatile chicken dish makes an ideal choice for busy evenings, offering a reliable and crowd-pleasing main course that adults and kids will enjoy. Serve alongside roasted asparagus, creamy pasta, or a fresh green salad for a complete dinner.
Crispy Buttered Ranch Chicken
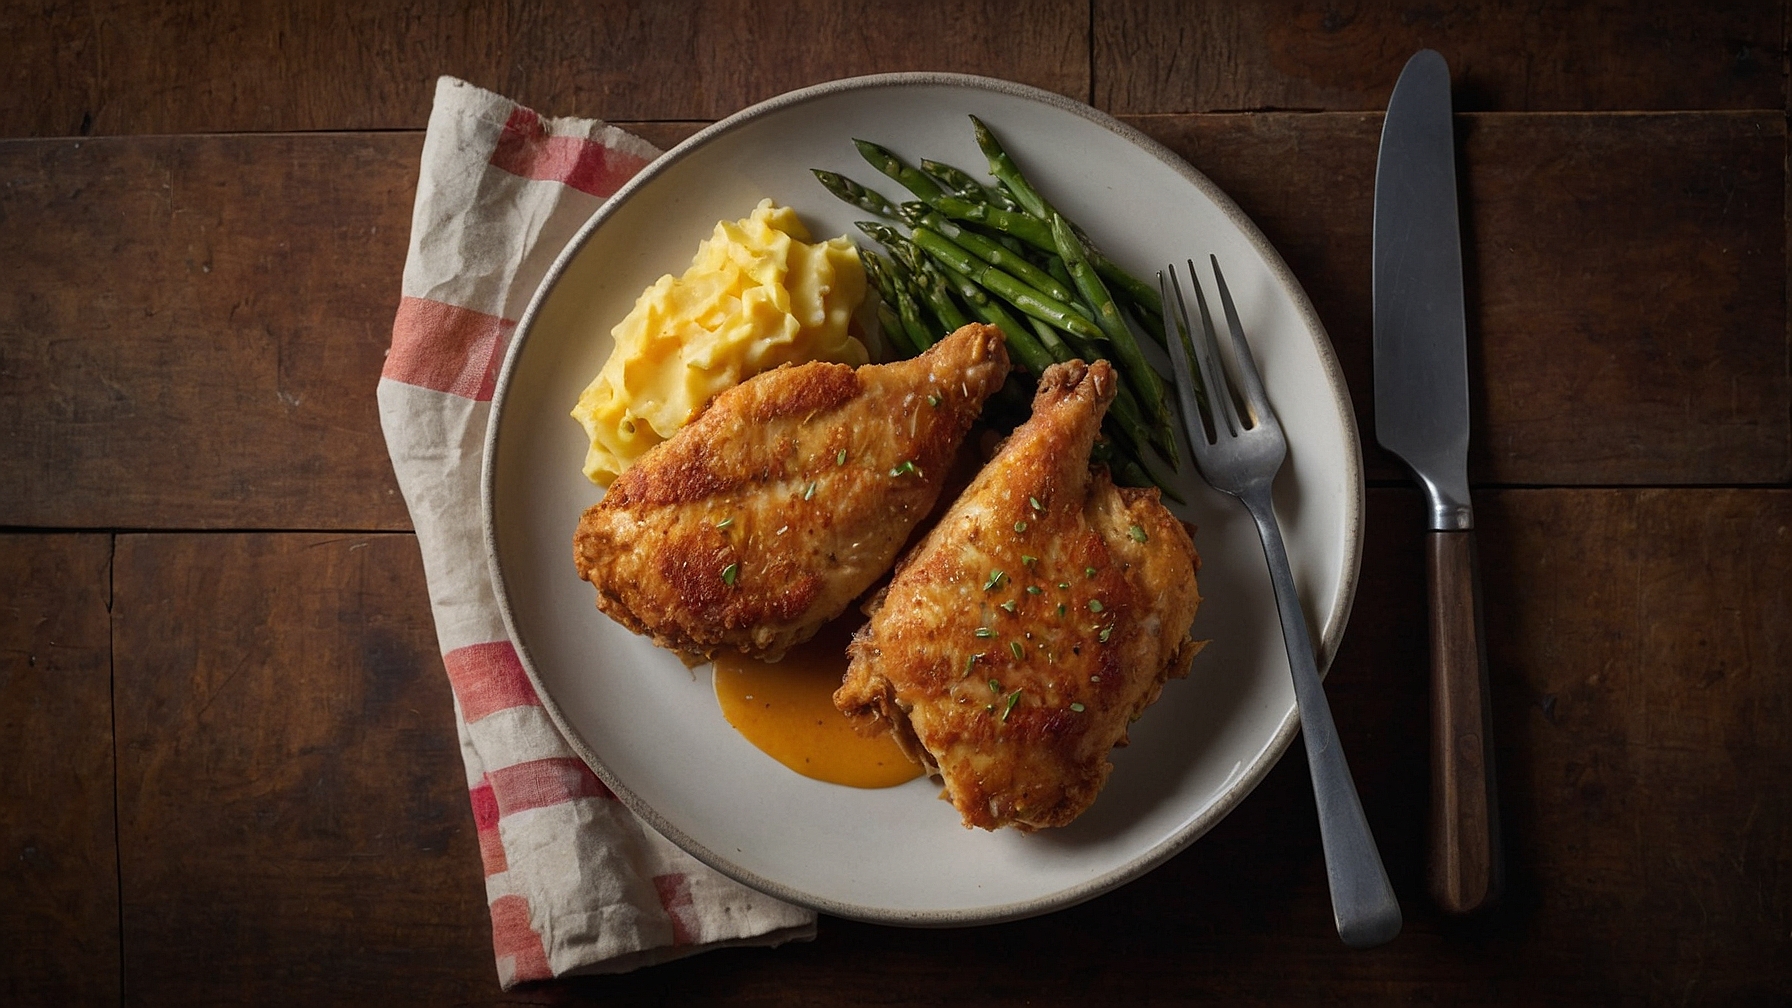
Crispy Buttered Ranch Chicken features golden, crispy chicken cutlets with a savory ranch coating and buttery crust, ideal for a weeknight meal.
Ingredients
- 1.5 lbs (680g) boneless, skinless chicken breasts, trimmed and sliced horizontally into 1/2-inch (1.25cm) cutlets
- 1 cup (120g) all-purpose flour, divided
- 1 (1 oz / 28g) packet dry ranch seasoning mix, divided
- 1 teaspoon (5ml) garlic powder, divided
- 1 teaspoon (5ml) smoked paprika, divided
- 1/2 teaspoon (2.5ml) black pepper, freshly ground, divided
- 1/2 teaspoon (2.5ml) salt, fine sea salt, divided
- 2 cups (100g) Panko breadcrumbs
- 2 large eggs, beaten
- 1/4 cup (60ml) whole milk
- 1/2 cup (113g) unsalted butter, divided
- 2 tablespoons (30ml) olive oil, extra virgin
- 2 tablespoons (30ml) fresh parsley, chopped, for garnish
- 4 lemon wedges, for serving (optional)
Instructions
- Prepare Chicken: Trim 1.5 lbs (680g) boneless, skinless chicken breasts. Slice each breast horizontally into 1/2-inch (1.25cm) thick cutlets. Place cutlets on a plate.
- Set Breading Stations: Arrange three shallow dishes in a line for breading.
- Mix Flour Station: In the first dish, whisk 1/2 cup (60g) all-purpose flour, 1/2 of 1 oz (28g) dry ranch seasoning, 1/2 teaspoon (2.5ml) garlic powder, 1/2 teaspoon (2.5ml) smoked paprika, 1/4 teaspoon (1.25ml) black pepper, and 1/4 teaspoon (1.25ml) salt for 15-20 seconds until combined.
- Whisk Egg Wash: In the second dish, whisk 2 large eggs and 1/4 cup (60ml) whole milk for 15-20 seconds until combined and slightly frothy.
- Mix Panko Station: In the third dish, combine 2 cups (100g) Panko breadcrumbs, remaining 1/2 cup (60g) all-purpose flour, remaining 1/2 of 1 oz (28g) dry ranch seasoning, 1/2 teaspoon (2.5ml) garlic powder, 1/2 teaspoon (2.5ml) smoked paprika, 1/4 teaspoon (1.25ml) black pepper, and 1/4 teaspoon (1.25ml) salt. Mix with a fork for 15-20 seconds until evenly distributed.
- Dredge Chicken: Dredge one chicken cutlet through the flour mixture. Shake off excess flour. Dip chicken into egg wash; let excess drip off. Press chicken into Panko mixture until fully coated. Transfer breaded cutlet to a baking sheet. Repeat for all remaining chicken cutlets.
- Heat Skillet: Heat 1/4 cup (56g) unsalted butter and 1 tablespoon (15ml) olive oil in a large skillet over medium-high heat (350°F / 175°C) for 2-3 minutes until butter melts and shimmers.
- Cook First Batch: Place 2-3 breaded chicken cutlets in the skillet without overcrowding. Cook 3-4 minutes per side until golden brown, crispy, and internal temperature reaches 165°F (74°C).
- Transfer Cooked Chicken: Remove cooked chicken cutlets from skillet. Transfer to a wire rack set over a baking sheet. Loosely tent with foil to keep warm.
- Cook Remaining Batches: Add remaining 1/4 cup (56g) unsalted butter and 1 tablespoon (15ml) olive oil to skillet. Melt butter until shimmering (1-2 minutes). Cook remaining chicken cutlets as in Step 8.
- Garnish: Arrange cooked chicken cutlets on a platter. Sprinkle with 2 tablespoons (30ml) chopped parsley.
- Serve: Serve chicken with lemon wedges (optional).
Notes
- To achieve the crispiest coating, ensure your cooking fat (butter and oil) is hot enough before adding the chicken, but not smoking. A temperature between 325-350°F (160-175°C) is ideal for pan-frying.
- For meal preparation, bread chicken cutlets up to 4 hours in advance. Store uncovered on a wire rack in the refrigerator to prevent sogginess.
- Modify flavor: Add 1/4 teaspoon (1.25ml) cayenne pepper to the flour mixture for a subtle heat. Substitute buttermilk for whole milk in the egg wash for added tang.
- Store leftovers in an airtight container in the refrigerator for up to 3 days. Reheat in an air fryer at 350°F (175°C) for 5-7 minutes, or in an oven at 375°F (190°C) for 10-15 minutes until heated through to retain crispiness.
Serving Suggestions
- Serve with a green salad tossed in vinaigrette.
- Serve with mashed potatoes or jasmine rice.
- Pair with steamed green beans, roasted asparagus, or honey-glazed carrots.
- Offer extra dry ranch seasoning or ranch dipping sauce on the side.
- Serve with a dollop of sour cream or homemade ranch dressing.
Pro Tips for Perfectly Crispy Buttered Ranch Chicken
Ingredient Tips
- Chicken Choice:Select bone-in, skin-on chicken thighs (approx. 6-8 oz each) for superior moisture and crispiness. Trim only large, dangling fat pieces; keep all skin intact for maximum crunch.
- Ranch Seasoning Ratio:For impactful flavor, measure 1.5 tablespoons of store-bought dry ranch seasoning mix per pound of chicken. For homemade, combine 1 tsp dried dill, 1 tsp dried chives, 1/2 tsp garlic powder, 1/2 tsp onion powder, 1/4 tsp salt, and 1/8 tsp black pepper per pound.
- Crisp-Boosting Flour Blend:Whisk together 1 cup all-purpose flour with 1/2 cup cornstarch and 1 teaspoon of aluminum-free baking powder per 1.5 lbs of chicken. Cornstarch adds a delicate crispness, and baking powder promotes browning and a shatteringly crisp texture by raising the skin’s pH.
- Butter Type & Quantity:Use 4 tablespoons (1/4 cup) unsalted butter, melted. Unsalted allows precise control over the final saltiness, preventing an overly salty dish.
- Optional Tenderizing Pre-Soak:For exceptionally tender chicken, submerge pieces in 1 cup of full-fat buttermilk for a minimum of 30 minutes, up to 4 hours, in the refrigerator. After soaking, rinse lightly and pat extremely dry with 3-4 paper towels per piece before proceeding.
Technique Tips
- Moisture Removal:Before seasoning, pat each chicken piece bone-dry using at least 3-4 paper towels. Any residual moisture is the primary enemy of crispiness and will create steam, leading to a soggy coating.
- Seasoning Adhesion & Flavor Layer:Toss chicken pieces with 1 tablespoon of olive oil or melted butter per 1.5 lbs of chicken before coating with ranch seasoning. This creates a tacky surface for the seasoning to adhere better and adds an initial layer of fat for crisping.
- Double Dredging for Extra Crunch:Dredge chicken thoroughly in the seasoned flour mixture, ensuring every surface is coated. For a truly robust crust, dip back into 1/2 cup whisked egg (1 large egg) and then immediately back into the flour mixture for a second coating. Press firmly to adhere.
- Optimal Oven Setup & Temperature:Preheat your oven to a blistering 425°F (220°C). Arrange chicken in a single layer on a wire rack placed over a baking sheet. This critical setup allows hot air to circulate completely around each piece, ensuring uniform crisping on all sides and preventing a soggy bottom.
- Baking Time & Internal Check:Bake for 25-35 minutes for boneless thighs, or 35-45 minutes for bone-in thighs, at 425°F (220°C). Use an instant-read thermometer to verify the thickest part of the chicken reaches 165°F (74°C). The skin should be a deep, uniform golden brown and visibly crackling.
- Strategic Butter Drizzle:Melt 4 tablespoons of unsalted butter and drizzle it evenly over the chicken during the final 10-12 minutes of baking. This timing ensures the butter infuses rich flavor and promotes a beautiful golden finish without compromising the initial crispness achieved by the dry coating.
- Post-Bake Resting:After removing from the oven, transfer chicken to a clean wire rack and let it rest for 5-10 minutes. This crucial step allows the meat fibers to relax and reabsorb juices, resulting in a significantly more tender and moist interior, while also helping to maintain the exterior’s crisp texture as steam escapes.
Common Issues
- Problem: Soggy Skin:The chicken skin lacks crispness and feels soft or chewy. This typically means too much moisture or lack of airflow. Ensure chicken is patted absolutely dry with 3-4 paper towels per piece before seasoning. Always bake on a wire rack set over a baking sheet to allow 360-degree air circulation. If still not crisp after 35 minutes at 425°F (220°C), increase oven temperature to 450°F (232°C) for the final 5-7 minutes, watching closely to achieve a crackling, golden-brown skin without burning.
- Problem: Underpowered Ranch Flavor:The signature ranch taste is subtle or barely noticeable. Boost the seasoning ratio. Use 1.5 tablespoons of ranch seasoning mix per pound of chicken. For an extra layer of flavor, melt 4 tablespoons of unsalted butter and stir in an additional 1 teaspoon of ranch seasoning before drizzling over the chicken during the last 10 minutes of baking.
- Problem: Dry Chicken:The chicken meat itself is tough, stringy, or lacks juiciness. Overcooking is the culprit. Use an instant-read thermometer and remove chicken from the oven immediately once the thickest part registers 165°F (74°C). For chicken breasts (which dry out faster), consider a pre-brine: soak in a solution of 1/4 cup kosher salt dissolved in 4 cups water for 30 minutes before patting completely dry and proceeding with the recipe.
- Problem: Coating Falling Off:The crispy ranch coating doesn’t adhere properly and separates from the chicken. Adhesion is key. First, ensure chicken is bone-dry and has a thin layer of oil/butter before the first flour dredge. When coating, press the flour mixture firmly onto the chicken with your hands, ensuring no gaps. For a strong bond, chill the coated chicken on a wire rack in the refrigerator for 20 minutes before baking; this helps the coating set.
- Problem: Burnt Exterior, Undercooked Interior:The coating is excessively dark or burnt, but the chicken inside isn’t fully cooked. If the coating is browning too rapidly, loosely tent the chicken with aluminum foil after 20-25 minutes of baking. Alternatively, reduce oven temperature by 25°F (to 400°F/200°C) for the remaining cook time, and continue baking until the internal temperature reaches 165°F (74°C), ensuring a perfectly cooked interior without scorching the crust.
How to Store, Reheat, and Serve Crispy Buttered Ranch Chicken
Refrigerator Storage
Duration: 3-5 days in an airtight container
For best results, store leftover Crispy Buttered Ranch Chicken in a shallow, airtight glass container. While it is safe to consume for up to 5 days, the chicken’s signature crispiness will soften considerably after the first day, especially if it was tossed with the buttered ranch sauce. The ranch flavor remains robust, but the fresh tang may mellow slightly after day 3. For optimal texture and flavor, we recommend enjoying leftovers within 2-3 days. Storing the chicken and sauce separately (if possible) can help preserve the chicken’s texture slightly longer.
Freezer Storage
Duration: 2-3 months
To freeze, allow the cooked chicken to cool completely. For best quality, flash freeze individual pieces by arranging them in a single layer on a parchment-lined baking sheet for 1-2 hours until solid. Once frozen, transfer the pieces to a heavy-duty freezer bag or vacuum-seal bag, ensuring as much air as possible is removed to prevent freezer burn. Label with the date. Thaw frozen chicken overnight in the refrigerator for 8-12 hours before reheating. Expect the chicken to lose significant crispiness and potentially become slightly drier upon reheating due to moisture loss during the freezing and thawing process. The breading may also become a bit softer and less cohesive.
Reheating Instructions
- Oven (Best for Crispiness):Preheat oven to 375°F (190°C). Place chicken pieces in a single layer on a wire rack set over a baking sheet. Reheat for 15-20 minutes, flipping once halfway through, until an internal temperature of 165°F (74°C) is reached and the crust is golden brown and audibly crispy. This method is highly recommended for restoring the chicken’s desirable texture.
- Air Fryer (Excellent for Crispiness & Speed):Preheat air fryer to 375°F (190°C). Arrange chicken in a single layer in the air fryer basket, ensuring not to overcrowd. Cook for 8-12 minutes, shaking the basket halfway through, until the chicken is heated through to 165°F (74°C) and the exterior is wonderfully crisp. This method is superb for achieving a near-fresh crispness quickly.
- Microwave (Quick but Sacrifices Texture):Place chicken on a microwave-safe plate. Heat on high for 1-2 minutes, checking at 30-second intervals, until heated through. Be advised: while the microwave is the fastest method, it will cause the breading to become soft and potentially rubbery, and the chicken itself may dry out. This method is only suitable if crispiness is not a priority.
Method Rating: The oven and air fryer are by far the superior methods for reheating Crispy Buttered Ranch Chicken, as they effectively restore the desired crispy exterior. The microwave is acceptable only for convenience, but it will significantly alter the texture.
Make-Ahead Tips
The chicken components can be prepped in advance to streamline mealtime. The raw chicken can be breaded up to 24 hours ahead of cooking. To do this, prepare the breading as usual, then place the breaded chicken pieces on a wire rack set over a baking sheet. Loosely cover with plastic wrap or parchment paper and refrigerate. This helps prevent the breading from becoming soggy. The ranch butter sauce can also be prepared up to 3 days in advance; store it in an airtight container in the refrigerator and gently rewarm and stir thoroughly before tossing with the freshly cooked, crispy chicken.