Baked Protein Pancake Bowls: Your New Favorite High-Protein Breakfast
These Baked Protein Pancake Bowls offer a game-changing, hands-off breakfast solution that eliminates the constant flipping of traditional pancakes, making mornings significantly easier.
Prepare a satisfying, high-protein meal in under 30 minutes total, with just 10 minutes of active preparation and 20 minutes in the oven, requiring only 8 simple ingredients and minimal cleanup.
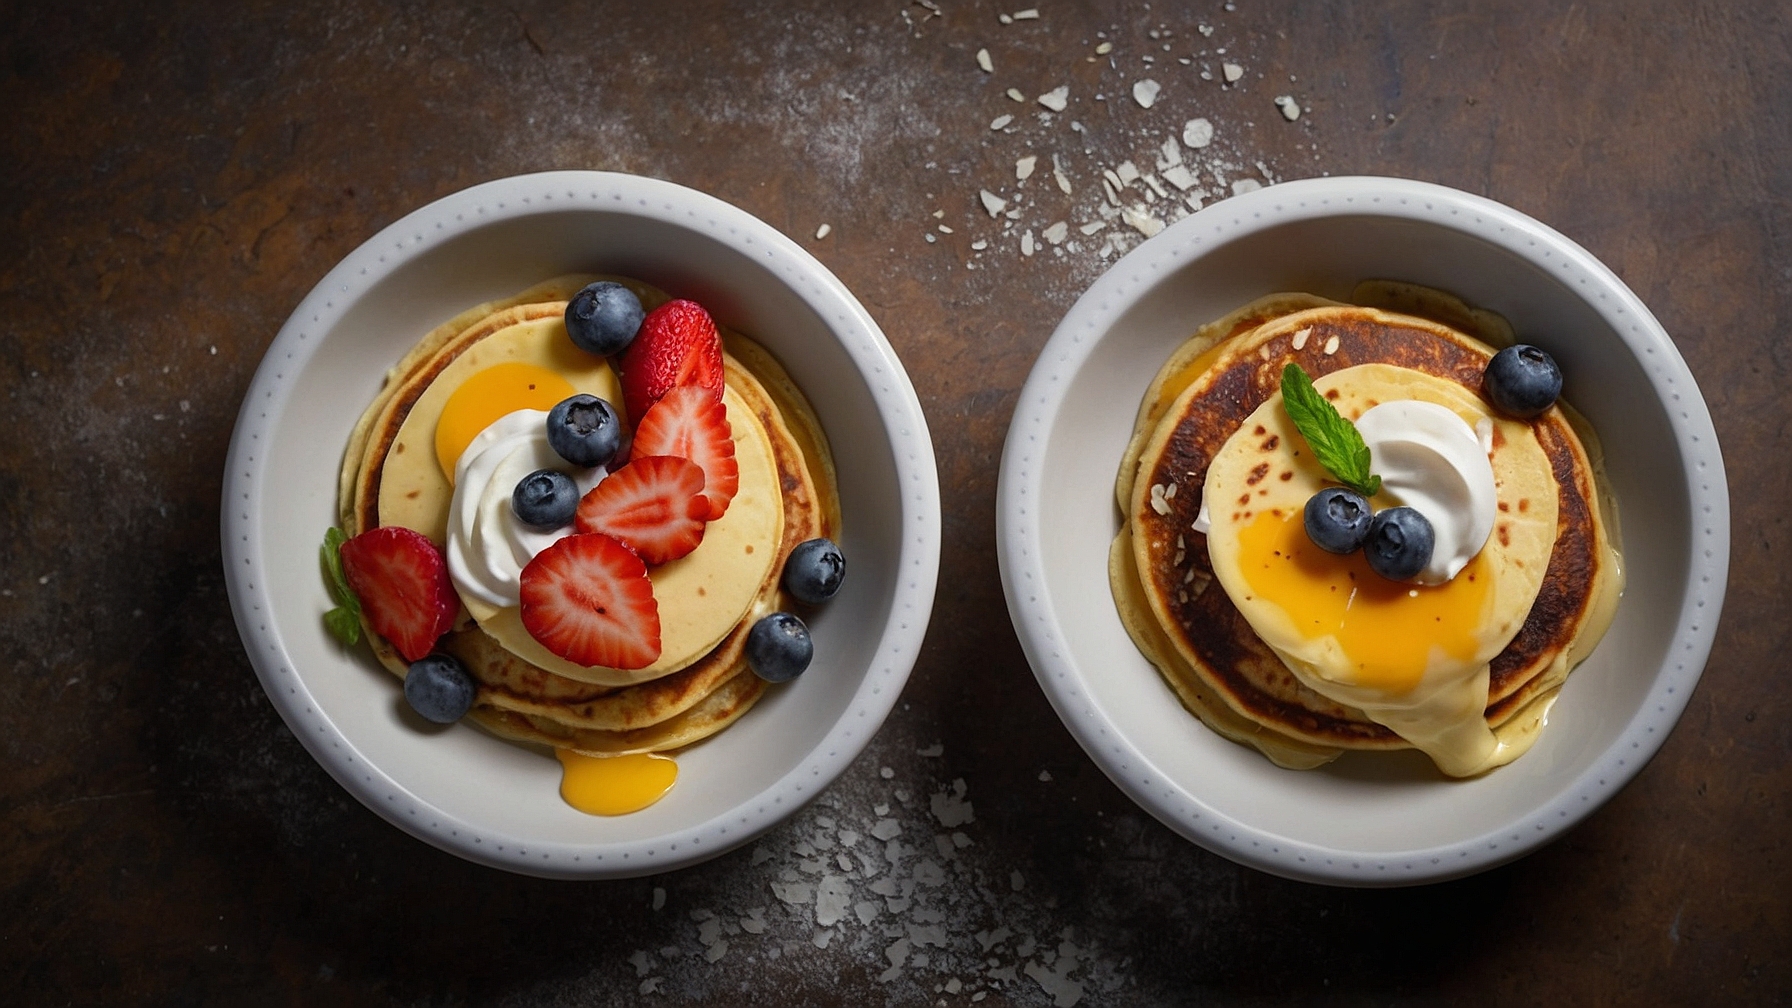
This method ensures a perfectly cooked, fluffy pancake base every time, ready to be customized with your favorite toppings like fresh berries, nuts, a drizzle of maple syrup, or a dollop of yogurt for a complete and nutritious start to your day.
Baked Protein Pancake Bowls
Prepare fluffy, high-protein pancake bowls without stovetop cooking.
Ingredients
- 1 cup (120g) oat flour, finely ground
- ½ cup (50g) vanilla or unflavored protein powder, whey or plant-based blend
- 2 tablespoons (25g) granulated sweetener, such as erythritol or coconut sugar
- 1 tablespoon (15g) baking powder
- ¼ teaspoon (1.25ml) sea salt
- 1 ¼ cups (300ml) unsweetened almond milk
- 2 large eggs, at room temperature
- 2 tablespoons (30ml) melted coconut oil or unsalted butter
- 1 teaspoon (5ml) vanilla extract
- ½ cup (75g) fresh berries, such as blueberries or raspberries
- ¼ cup (60g) Greek yogurt, plain or vanilla
- 2 tablespoons (30ml) maple syrup, or sugar-free alternative
- 1 tablespoon (15g) chopped nuts, such as pecans or walnuts
- 1 teaspoon (5g) chia seeds
- 1 tablespoon (15g) chocolate chips, mini or regular (optional)
Instructions
- Preheat oven to 375°F (190°C). Lightly grease 2-4 (295-355ml) oven-safe bowls or ramekins with cooking spray or butter.
- In a large mixing bowl, whisk together the oat flour, protein powder, granulated sweetener, baking powder, and sea salt for 30 seconds until thoroughly combined and no lumps of powder are visible.
- In a separate medium bowl, whisk together the unsweetened almond milk, large eggs, melted coconut oil (or butter), and vanilla extract for 1 minute until the mixture is smooth and evenly combined.
- Pour the wet ingredients into the dry ingredients. Gently fold with a spatula or whisk for 1 minute until just combined. A few small lumps are acceptable; ensure no large pockets of dry flour remain.
- Evenly divide the batter among the prepared bowls, filling each approximately two-thirds full, allowing room for rising.
- Transfer bowls to the preheated oven. Bake for 20-25 minutes until tops are golden brown, puffy, and a wooden skewer inserted into the center comes out clean.
- Carefully remove baked pancake bowls from the oven. Let them cool on a wire rack for 5 minutes to set fully.
- Garnish each warm pancake bowl with fresh berries, Greek yogurt, maple syrup, chopped nuts, or chia seeds.
- Serve warm for optimal texture and flavor.
Notes
- Protein Powder Type: Whey protein creates a lighter, fluffier texture. Casein or plant-based proteins (pea protein) may thicken batter; add 1-2 tablespoons (15-30ml) milk for desired consistency. Use unflavored or preferred protein powder flavor.
- Flour Alternatives: Oat flour offers nutritional benefits and a light texture. Substitute with whole wheat or all-purpose flour (1:1 ratio). For gluten-free, use a gluten-free all-purpose blend; results may vary, liquid adjustments may be needed. For almond flour, reduce milk by approximately ¼ cup (60ml).
- Sweetener Adjustments: Adjust sweetener quantity as desired. If using liquid sweeteners (maple syrup, honey), reduce milk by an equivalent amount to maintain batter consistency. Add ¼ teaspoon (1.25ml) cinnamon or nutmeg to dry ingredients for additional flavor.
- Milk Variations: Use dairy milk (whole, skim, 2%) or non-dairy alternatives (soy, cashew, carton coconut milk). Fat content influences richness.
- Storage and Reheating: Store leftover baked pancake bowls in an airtight container in the refrigerator for up to 3 days. Reheat in microwave for 60-90 seconds until warm, or bake in preheated oven at 300°F (150°C) for 10-15 minutes until heated through. Expect some loss of initial fluffiness after reheating.
- Adding Fruit Directly to Batter: Fold ½ cup (75g) fresh or frozen (do not thaw) berries or thinly sliced banana into batter before dividing for added flavor and moisture.
- Ensuring Doneness: Pancake bowls may appear done but be undercooked internally, especially with thick batters or large bowls. Perform the toothpick test: if it comes out with wet batter, bake 2-5 minutes longer, then retest until clean.
Pro Tips for Perfect Baked Protein Pancake Bowls
Ingredient Tips
- Protein Powder Type:Use whey isolate for a lighter, fluffier bowl, limiting to 25g per serving. For a denser, cake-like texture, incorporate up to 30g casein protein, adjusting liquid by adding 1-2 tablespoons extra milk to compensate for its higher absorption.
- Flour & Dry Ingredient Hydration:Combine all dry ingredients, including 1/4 cup (25g) oat flour, in a separate bowl and whisk vigorously for 30 seconds before adding to wet ingredients; this prevents protein powder clumping and ensures even distribution.
- Leavening Agent Potency:Test your baking powder by mixing 1/2 teaspoon with 1/4 cup hot water; vigorous bubbling within 10 seconds confirms it’s fresh and will give your bowls maximum lift, preventing a dense result.
- Liquid Temperature:Ensure your milk (e.g., 1/2 cup almond milk) is at room temperature (around 70°F/21°C); cold liquid can seize the protein powder, creating lumps and requiring longer mixing, which can lead to a tougher texture.
Technique Tips
- Gentle Mixing:Combine wet and dry ingredients with a whisk, stirring just until no dry streaks of flour remain, about 15-20 gentle strokes; overmixing develops gluten, resulting in a chewy, dense, and less tender pancake bowl.
- Resting Batter:Let the mixed batter rest for 5-10 minutes at room temperature before pouring into ramekins; this allows the flour to fully hydrate and gluten to relax, yielding a significantly fluffier, more tender final product.
- Proper Ramekin Preparation:Generously grease 4-inch (6 oz) ramekins with 1/2 teaspoon melted coconut oil, then dust with 1 teaspoon all-purpose or oat flour, tapping out excess; this creates a non-stick barrier and promotes a beautifully golden brown exterior.
- Optimal Baking Temperature:Preheat your oven to a precise 375°F (190°C) for a minimum of 15 minutes before baking; this ensures the oven cavity is evenly heated, promoting a rapid rise and preventing a dense, undercooked center.
- Visual Doneness Cue:Bake for 18-22 minutes for a 6 oz ramekin; look for bowls with edges that are a uniform golden brown and a toothpick inserted into the center comes out clean, indicating thorough cooking and no raw batter.
Common Issues
- Dry, Crumbly Texture:If your bowls are consistently dry, increase the liquid by 1-2 tablespoons (milk or water) for every 30g of protein powder used, aiming for a batter consistency that slides off a spoon in a thick, uniform ribbon, not in clumps.
- Sunk Center/Underbaked:If the center sinks or remains gooey, avoid opening the oven door for the first 10-12 minutes of baking to prevent heat loss, which can cause premature collapse; always ensure your baking powder is fresh.
- Sticking to Dish:If bowls stick, ensure your greasing technique involves both 1/2 teaspoon melted butter or oil applied with a brush to every crevice, followed by a light dusting of 1 teaspoon flour, completely coating the interior of the dish.
- Uneven Browning:For consistent browning, ensure your oven rack is in the center position and rotate the baking dish 180 degrees halfway through the baking process (e.g., at the 9-minute mark for an 18-minute bake), promoting uniform heat distribution.
Storage, Reheating, and Creative Customizations
Refrigerator Storage
Duration: 3-4 days in airtight container
For optimal freshness, store completely cooled Baked Protein Pancake Bowls in an airtight glass container in the refrigerator for 3-4 days. Beyond this, expect a slight decrease in their inherent fluffiness and a denser texture. Bowls with delicate fresh fruits like berries may soften at the bottom by day 3 due to moisture release. Savory versions generally hold texture better but can dry out around the edges if not sealed perfectly.
Freezer Storage
Duration: 2 months
For longer-term meal prep, freeze entirely cooled Baked Protein Pancake Bowls. Individually wrap each bowl first in plastic wrap, then aluminum foil, or place them in a heavy-duty freezer bag or airtight freezer-safe container to prevent freezer burn. Store for up to 2 months. Thaw by transferring to the refrigerator overnight (8-10 hours) or using your microwave’s defrost setting. Expect a minor textural shift; they might be slightly less light and fluffy, becoming more compact or subtly chewy upon reheating.
Reheating Instructions
- Oven:Preheat oven to 350°F (175°C). Place thawed pancake bowl(s) on a baking sheet and heat for 10-15 minutes, or until thoroughly warmed through and slightly golden on the edges. For frozen bowls, add 10-15 minutes to the total time. Rating: Best method for restoring texture and achieving a light crispness.
- Air Fryer:Preheat air fryer to 325°F (160°C). Place thawed pancake bowl directly in the basket and cook for 5-7 minutes, checking halfway, until hot and the top is lightly toasted. For frozen bowls, add 5-8 minutes. Rating: Excellent for a quick, crisp exterior.
- Microwave:Place thawed pancake bowl in a microwave-safe bowl. Heat on high for 60-90 seconds, checking at 30-second intervals, until heated through. This method is the fastest but may result in a slightly chewier or gummier texture, and the top will not firm up. Rating: Acceptable for speed, but may compromise original texture.
Make-Ahead Tips
Maximize convenience with make-ahead strategies. The dry mix (flour, protein powder, baking powder, spices) can be measured and combined in an airtight container up to 2 weeks in advance. The complete batter can be prepared up to 2 days ahead; whisk all wet ingredients, then gently fold in the dry mix. Store in a sealed container in the refrigerator, stirring gently before use, as it may thicken. For fresh toppings, chop fruits, measure nuts, or portion chocolate chips up to 3-4 days in advance and store them in separate small airtight containers in the refrigerator. This streamlines assembly and baking significantly.