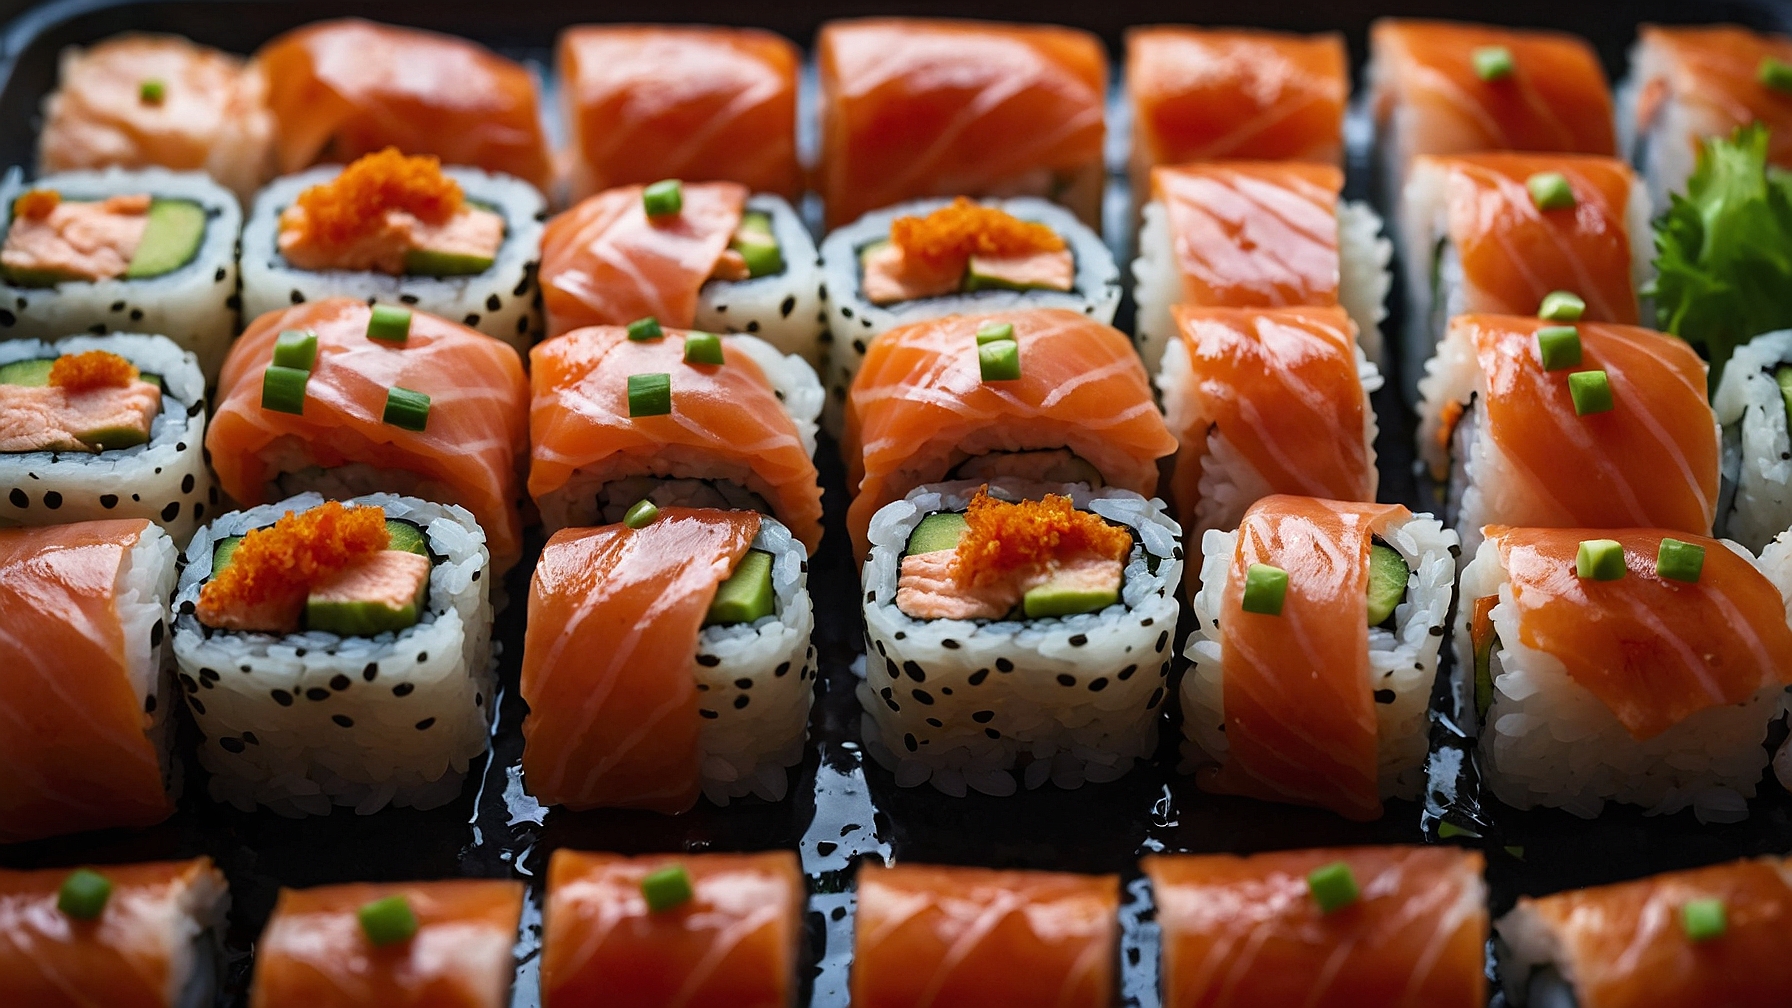
Spicy Salmon Sushi Bake: Your Favorite Sushi, Baked!
This Spicy Salmon Sushi Bake delivers all the satisfying flavors of your favorite sushi roll without the need for complicated rolling techniques.
It bakes in just 20 minutes, transforming cooked salmon and seasoned rice into a creamy, flavorful casserole.
Serve this sushi bake with nori sheets and sliced avocado for an interactive and customizable meal.
The recipe utilizes readily available ingredients, making it an accessible weeknight dinner option. Pre-cooked salmon ensures quick preparation, allowing you to assemble the bake in under 15 minutes. A rich combination of cream cheese, mayonnaise, and sriracha forms the signature spicy topping. This dish is excellent for feeding a crowd or preparing ahead for convenient leftovers throughout the week. Garnish with sesame seeds and green onions for added texture and fresh flavor, offering a warm, comforting take on classic spicy salmon rolls suitable for any occasion.
Spicy Salmon Sushi Bake
Prepare a deconstructed sushi experience with seasoned rice and a spicy baked salmon mixture.
Ingredients
For the Sushi Rice Base
- 2 cups (400g) uncooked short-grain sushi rice, rinsed until water runs clear
- 2.5 cups (600ml) cold water
- 1/4 cup (60ml) unseasoned rice vinegar
- 2 tablespoons (30g) granulated sugar
- 1 teaspoon (5g) fine sea salt
For the Spicy Salmon Filling
- 1.5 lbs (680g) skinless, boneless salmon fillets, patted dry
- 1 tablespoon (15ml) olive oil
- 1/2 teaspoon (2.5g) fine sea salt
- 1/4 teaspoon (1g) ground black pepper
- 1/2 cup (120ml) Japanese mayonnaise
- 1/4 cup (60ml) sriracha sauce
- 1 tablespoon (15ml) low-sodium soy sauce
- 1 teaspoon (5ml) toasted sesame oil
- 3 medium green onions, thinly sliced
For Topping and Serving
- 2 tablespoons (30g) furikake seasoning
- 2 medium avocados, pitted, peeled, sliced
- 1 tablespoon (15g) toasted sesame seeds
- 5-6 sheets (10g) roasted seaweed (nori), cut into squares
- Optional: 1 fresh jalapeño, thinly sliced
- Optional: Low-sodium soy sauce, for dipping
Instructions
- Preheat oven to 400°F (200°C).
- Combine 2 cups (400g) rinsed sushi rice and 2.5 cups (600ml) cold water in a medium saucepan with a tight lid. Bring to a boil over high heat. Reduce heat to low, cover, and simmer for 15 minutes until water absorbs. Remove from heat, keep covered, and steam for 10 minutes.
- Whisk 1/4 cup (60ml) rice vinegar, 2 tablespoons (30g) granulated sugar, and 1 teaspoon (5g) fine sea salt in a small bowl until dissolved.
- Transfer cooked rice to a large non-metallic bowl. Pour sushi vinegar mixture over rice. Gently fold the mixture into the rice using a paddle, separating grains until uniformly distributed. Cover rice with a damp cloth.
- Place salmon fillets on a parchment-lined baking sheet. Drizzle with 1 tablespoon (15ml) olive oil. Season with 1/2 teaspoon (2.5g) fine sea salt and 1/4 teaspoon (1g) ground black pepper. Bake for 12-15 minutes at 400°F (200°C) until salmon flakes at 145°F (63°C).
- Transfer cooled salmon to a large bowl. Flake salmon into small pieces with two forks, removing any bones or skin.
- Add 1/2 cup (120ml) Japanese mayonnaise, 1/4 cup (60ml) sriracha sauce, 1 tablespoon (15ml) low-sodium soy sauce, 1 teaspoon (5ml) toasted sesame oil, and two-thirds of the sliced green onions to the flaked salmon. Stir until salmon is evenly coated.
- Lightly grease a 9×13 inch (23×33 cm) baking dish. Press seasoned sushi rice evenly into the dish bottom, forming a uniform layer.
- Spread spicy salmon mixture evenly over the sushi rice layer. Pat down to create a smooth, uniform surface.
- Bake for 15-20 minutes at 400°F (200°C) until the salmon mixture is golden brown and bubbling at the edges.
- Remove sushi bake from oven. Sprinkle with 2 tablespoons (30g) furikake seasoning, remaining green onions, and 1 tablespoon (15g) toasted sesame seeds. Arrange sliced avocado over top. Serve warm with nori squares and optional sliced jalapeño and soy sauce.
Pro Tips for a Perfect Sushi Bake
Ingredient Tips
- Sushi Rice Rinsing:Rinse 1.5 cups short-grain sushi rice 3-4 times in a fine-mesh sieve until water runs completely clear (approx. 2 minutes), for distinct, fluffy grains.
- Perfect Rice Seasoning:While 1.5 cups cooked rice is warm, gently fold in 3 tablespoons rice vinegar, 1.5 tablespoons sugar, and 1 teaspoon salt. Use a cutting motion for 30 seconds for glossy, separate grains.
- Optimal Salmon Baking:Bake 1.5 lbs salmon fillet at 400°F (200°C) for 12-15 minutes, until 145°F (63°C) internally and it flakes easily with a fork. Pat dry for a crisp exterior.
- Creamy Spicy Mayo Base:Combine 1/2 cup full-fat Japanese mayonnaise, 2 tablespoons Sriracha, 1 tablespoon low-sodium soy sauce, and 1 teaspoon toasted sesame oil. Mix until smooth, it slides off a spoon; adjust Sriracha by 1/2 tablespoon for heat.
Technique Tips
- Firm Rice Foundation:Press seasoned sushi rice firmly into an even 3/4-inch thick layer in a 9×13 inch baking dish. Use a lightly dampened spoon to compact it for 45 seconds, for a stable base.
- Gentle Salmon Flaking:Allow baked salmon to cool for 5 minutes. Use two forks to gently flake it into 1/2-inch to 3/4-inch pieces. Avoid mashing to maintain chunky texture.
- Even Topping Distribution:Spread the spicy salmon mixture evenly over the rice layer, ensuring it’s about 1-inch thick across the entire surface. Use an offset spatula to smooth for consistent baking and appearance.
- Achieving Golden Crispness:Bake the sushi bake at 375°F (190°C) for 15-20 minutes, then switch to high broiler for 3-4 minutes. Broil until the top is bubbling at the edges and achieves a rich golden-brown color.
Common Issues
- Soggy Rice Base:If rice is soggy, ensure thorough rinsing (water clear for 2 minutes) and 10 minutes steaming after cooking. Season while hot to allow steam escape, preventing excess moisture.
- Dry Salmon Topping:Avoid dry salmon by removing at 145°F (63°C). Ensure spicy mayo fully coats flaked salmon by gently folding for 20-30 seconds, forming a protective moisture barrier.
How to Store and Reheat Your Sushi Bake
Refrigerator Storage
Duration: 3-4 days in airtight container
To maintain optimal flavor and texture, store your Spicy Salmon Sushi Bake in an airtight glass container immediately after cooling. Glass is preferred over plastic as it prevents the absorption of odors and flavors, ensuring the sushi bake retains its fresh taste. While safe to consume for up to 4 days, the peak quality – in terms of the salmon’s succulence and the rice’s pleasant chewiness – is best within the first 2 days. Over time, the sushi rice will firm up slightly due to starch retrogradation, and the salmon can lose some of its initial moisture. The spicy mayo topping may thin slightly, and the nori strips, if mixed in, will become soft. The vibrant spice might mellow a touch after prolonged refrigeration, losing some of its initial brightness.
Freezer Storage
Duration: 1 month
Freezing Spicy Salmon Sushi Bake is possible, but be prepared for noticeable texture changes. For best results, allow the bake to cool completely, then portion it into individual servings. Wrap each portion tightly first in plastic wrap, ensuring no air exposure, then wrap again in aluminum foil. Place these double-wrapped portions into a freezer-safe bag or rigid container to prevent freezer burn. To thaw, transfer the frozen portions to the refrigerator and allow them to defrost overnight, typically 8-12 hours. Upon thawing and reheating, the sushi rice may become softer or slightly mushy, and the salmon can become drier and a bit flakier. The spicy mayo topping is prone to slight separation, appearing a little watery, and the overall structural integrity of the bake will be diminished. Freezing is an option for convenience, but the freshness and texture will not compare to a freshly baked or refrigerated version.
Reheating Instructions
- Oven (Best Method):Preheat oven to 350°F (175°C). Place the sushi bake in an oven-safe dish, covered loosely with aluminum foil to prevent drying. Bake for 15-20 minutes. For a slightly crispy top, remove the foil for the last 5 minutes. The bake is ready when heated through, the salmon mixture is warm and bubbly, and the edges are lightly golden. This method best preserves the texture of the rice and the integrity of the topping.
- Air Fryer (Good for Single Portions):Preheat air fryer to 325°F (160°C). Place a single portion of the sushi bake in the air fryer basket. Cook for 8-12 minutes, checking halfway through. The bake is ready when warmed through and the top is slightly crispy. This method is quick and effective for achieving a nice crust, but be mindful of potential drying if overcooked.
- Microwave (Acceptable, but May Change Texture):Place a single portion on a microwave-safe plate. Heat on medium power for 30-60 seconds, check, and continue heating in 15-second intervals until warmed through. Be cautious not to overcook, as microwaving can make the rice mushy and the salmon rubbery. This is the quickest method, ideal for convenience, but it compromises the texture and crispness compared to oven or air fryer reheating.
Make-Ahead Tips
To streamline your sushi bake preparation, several components can be prepped in advance. The cooked spicy salmon mixture, a crucial element, can be prepared up to 2 days ahead of time. Store it in an airtight glass container in the refrigerator. Similarly, the seasoned sushi rice can be cooked and cooled up to 1 day in advance. Store the cooked sushi rice in an airtight container at room temperature if you plan to use it within a few hours to maintain its soft texture; if storing overnight, refrigerate it and bring it to room temperature before assembling. The nori sheets should always be kept in their original sealed package at room temperature and added right before baking to prevent them from becoming soggy and to ensure maximum crispness during the final bake. This pre-preparation allows for quick assembly and baking when you’re ready to serve.