Garlicky Chicken With Onions: Your New Weeknight Go-To
This Garlicky Chicken With Onions delivers maximum flavor with minimal effort, making it ideal for busy weeknights.
It transforms simple chicken thighs and sweet onions into a succulent dish in just 35 minutes, utilizing under 10 common ingredients.
Serve this flavorful chicken over fluffy rice or alongside steamed greens for a complete and satisfying meal.
Garlicky Chicken With Onions
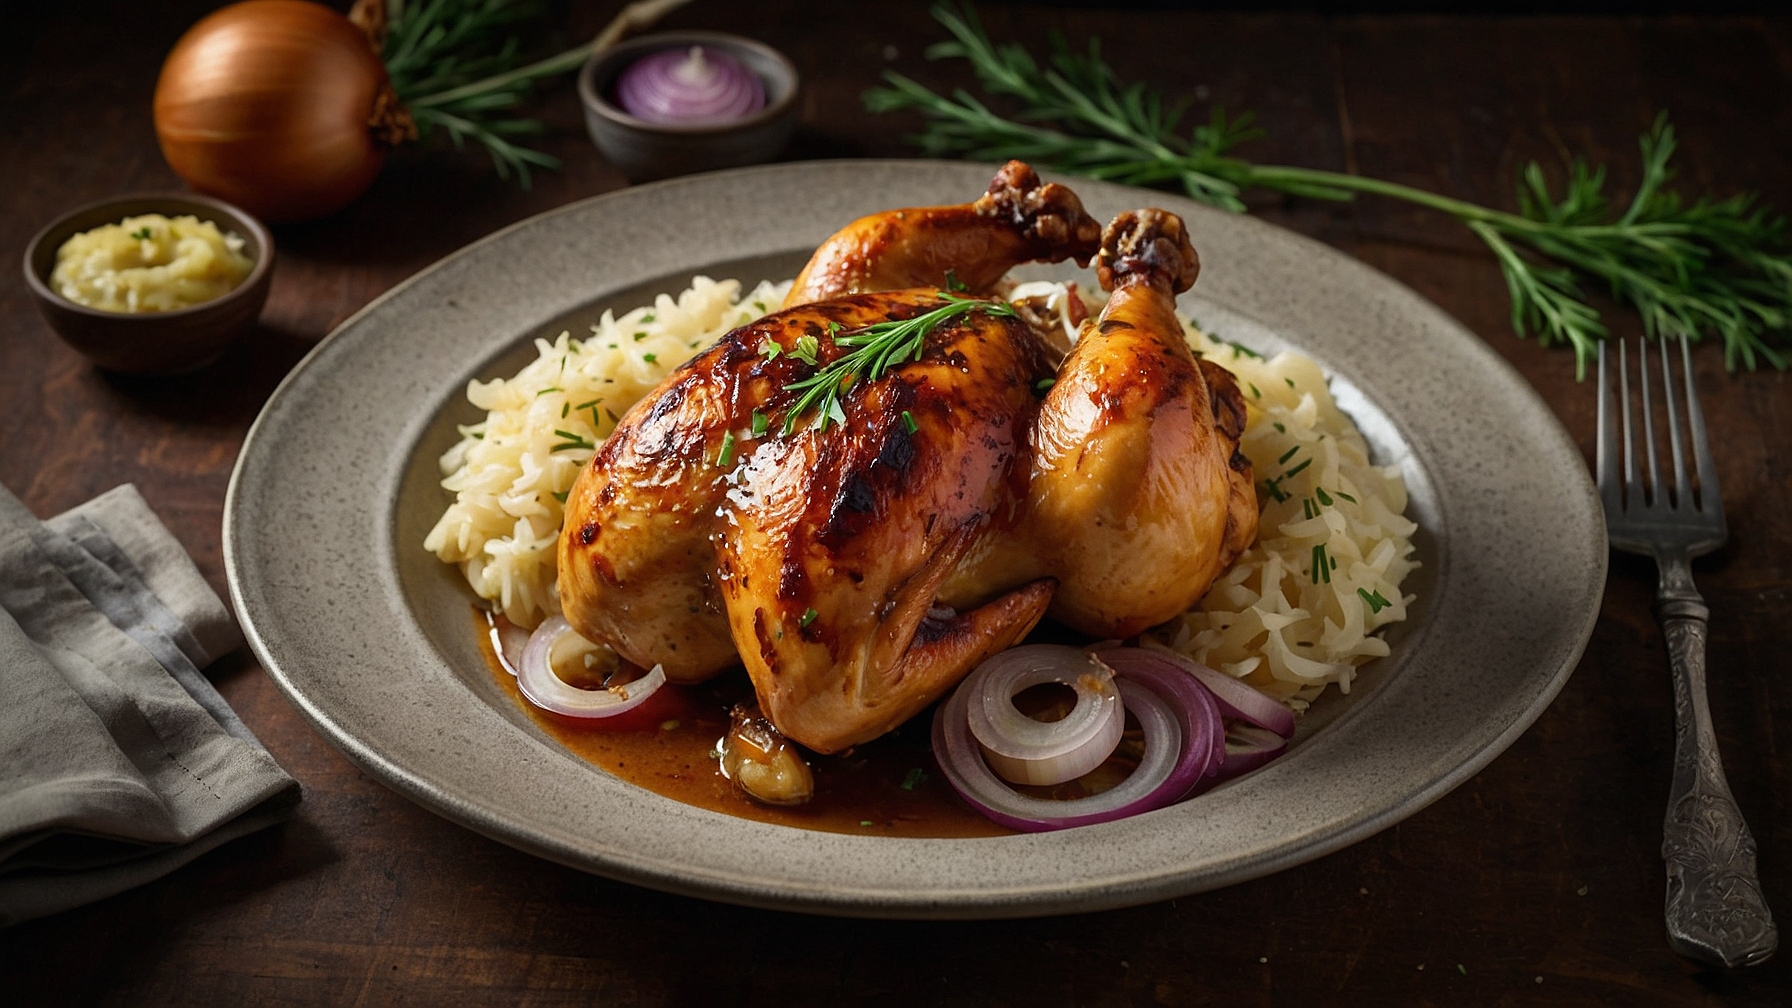
Prepare chicken pieces and caramelized onions simmered in a garlic sauce.
Ingredients
Main Components
- 1.5 lb (680g) boneless, skinless chicken thighs or breasts, cut into 1-inch (2.5 cm) cubes
- 2 large yellow onions (450g), thinly sliced against the grain
- 6-8 medium cloves fresh garlic (28g), finely minced or pressed
Braising Liquid & Seasoning
- 2 tbsp (30ml) extra virgin olive oil, divided
- 1 cup (240ml) warm low-sodium chicken broth
- 2 tbsp (30ml) low-sodium soy sauce
- 1 tsp (5ml) dried thyme or 1 tbsp (15ml) fresh thyme, finely chopped
- 1/2 tsp (2.5g) sea salt
- 1/4 tsp (0.5g) freshly ground black pepper
Optional Thickener & Garnish
- 1 tbsp (15g) cornstarch
- 2 tbsp (30ml) cold water
- 2 tbsp (30ml) fresh flat-leaf parsley, finely chopped
Instructions
- Pat chicken cubes dry with paper towels. Season chicken with 1/4 tsp (1.25g) sea salt and 1/8 tsp (0.25g) freshly ground black pepper.
- Place a large, heavy-bottomed skillet or Dutch oven over medium-high heat. Add 1 tbsp (15ml) extra virgin olive oil. Heat 1-2 minutes until oil shimmers and shows faint wisps of smoke.
- Add half of seasoned chicken cubes to the hot skillet in a single layer. Cook undisturbed 3-4 minutes per side until golden brown and caramelized. Remove chicken to a clean plate.
- Add remaining 1 tbsp (15ml) olive oil to the skillet. Repeat searing with the second batch of chicken. Cook 3-4 minutes per side until golden brown. Transfer chicken to the plate with the first batch.
- Reduce heat to medium. Add sliced yellow onions to the skillet. Scrape pan bottom to loosen browned bits. Cook 8-10 minutes, stirring occasionally, until softened and translucent.
- Create a clearing in the center of the onions. Add minced garlic and dried or fresh chopped thyme. Cook 1 minute, stirring constantly, until fragrant and lightly golden. Mix into onions.
- Pour 1 cup (240ml) warm low-sodium chicken broth and 2 tbsp (30ml) low-sodium soy sauce into the skillet. Increase heat to medium-high. Bring to a simmer. Scrape pan bottom to dissolve browned bits.
- Return seared chicken pieces and any accumulated juices to the skillet. Stir.
- (Optional) Prepare slurry: Whisk 1 tbsp (15g) cornstarch with 2 tbsp (30ml) cold water in a small bowl. Pour slurry into simmering sauce. Stir continuously 1-2 minutes until sauce thickens.
- Reduce heat to low. Cover skillet with a lid. Simmer 5-7 minutes. Chicken is cooked when an instant-read thermometer reads 165°F (74°C).
- Taste sauce. Add additional sea salt and freshly ground black pepper as needed. Remove skillet from heat. Garnish with 2 tbsp (30ml) fresh chopped flat-leaf parsley.
Notes
- Flavor Tip: Deglaze pan with 1/4 cup (60ml) dry white wine (e.g., Sauvignon Blanc, Pinot Grigio) after sautéing onions and before broth. Simmer 1-2 minutes, scraping pan, until reduced by half.
- Chicken Choice: Boneless, skinless chicken thighs are recommended. Thighs retain moisture better during simmering due to higher fat content. If using breasts, monitor simmering time to prevent dryness.
- Serving: Serve over mashed potatoes, white rice, egg noodles, or with crusty bread. A green salad complements the dish.
- Meal Prep: Store cooled leftovers in an airtight container in the refrigerator for 3-4 days. Reheat on stovetop over low heat, adding a splash of chicken broth or water if needed.
Pro Tips for Perfect Garlicky Chicken With Onions
Ingredient Tips
- Chicken Thigh Preparation:Pat boneless, skinless chicken thighs completely dry with 3-4 sheets of paper towel per thigh to achieve a crispier sear and better caramelization, crucial for developing deep flavor in 5-7 minutes per side.
- Garlic Quantity & Timing:For an intensely “garlicky” flavor, use 12-15 cloves of fresh garlic, finely minced. Add it to the pan after the onions have cooked for 8-10 minutes to prevent burning and develop its full aroma during the last 1-2 minutes of sautéing.
- Onion Slicing:Slice two large yellow onions (approximately 1.5 lbs total) into consistent 1/4-inch half-moons. This specific thickness ensures they soften and caramelize evenly within 10-12 minutes without burning, creating a sweet, foundational base.
- Oil Choice for Searing:Use 2 tablespoons of a high-smoke-point oil like grapeseed or avocado oil for searing. This allows you to achieve a beautiful, deep golden-brown crust on the chicken at medium-high heat (375-400°F) without smoking, in just 4-5 minutes per side.
- Pre-Seasoning Chicken:Season your chicken pieces with 1 teaspoon of kosher salt and 1/2 teaspoon of freshly ground black pepper per poundat least 30 minutes before cooking. This allows the salt to penetrate the meat, leading to juicier, more flavorful results and preventing surface dryness.
Technique Tips
- Searing in Batches:To ensure a proper sear, cook chicken in small batches, leaving at least 1 inch of space between pieces. This prevents the pan temperature from dropping below 375°F, allowing the chicken to develop a beautiful, deep golden-brown crust in 4-5 minutes per side.
- Slow Caramelization of Onions:After searing the chicken, reduce the heat to medium-low and cook the onions for 15-20 minutes, stirring every 2-3 minutes, until they are deeply amber and jam-like. This slow process coaxes out their natural sweetness, building foundational flavor.
- Proper Garlic Bloom:Add your minced garlic to the pan after the onions have softened for 8-10 minutes. Sauté for only 60-90 seconds, stirring constantly, until it becomes fragrant and translucent, but before it begins to brown, preventing any bitter taste.
- Effective Deglazing:Immediately after adding garlic, pour in 1/2 cup of chicken broth or dry white wine to deglaze the pan. Use a wooden spoon to scrape up all the browned bits (fond) from the bottom, incorporating these concentrated flavors into the sauce as it reduces for 2-3 minutes.
- Controlled Simmering:Return the seared chicken to the pan with the onions and sauce, cover tightly, and simmer over low heat (180-200°F) for 10-15 minutes. This gentle cooking ensures the chicken becomes fork-tender and absorbs the rich flavors, reaching an internal temperature of 165°F.
Common Issues
- Dry, Rubbery Chicken:Problem: Overcooked chicken. Solution: Use an instant-read thermometer to check internal temperature; remove chicken from heat immediately when it reaches 160-162°F. Residual heat will carry it to the perfect 165°F while resting, ensuring juicy results.
- Burnt or Bitter Onions:Problem: Heat too high, insufficient stirring. Solution: Cook onions over medium-low heat (around 250°F) and stir them every 1-2 minutes to ensure even caramelization. If they start to brown too quickly, add 1 tablespoon of water to cool the pan and slow the process.
- Thin, Watery Sauce:Problem: Sauce not reduced sufficiently. Solution: After removing the cooked chicken, increase heat to medium-high and reduce the sauce for 3-5 minutes, stirring frequently, until it visibly thickens and coats the back of a spoon. For a quicker fix, whisk in 1 teaspoon of cornstarch mixed with 1 tablespoon of cold water and simmer for 1 minute.
- Raw or Burnt Garlic Flavor:Problem: Incorrect timing or heat. Solution: Add minced garlic when the onions are translucent and slightly softened, then sauté for exactly 60-90 seconds, stirring constantly. Watch for fragrance, not browning, which indicates burning and bitterness.
- Lack of Flavor Depth:Problem: Insufficient seasoning or improper deglazing. Solution: Ensure chicken is seasoned with 1 teaspoon kosher salt and 1/2 teaspoon black pepper per poundbefore cooking. Crucially, always deglaze the pan with 1/2 cup liquid and meticulously scrape up all the browned fond, which is the key to a rich, complex sauce.
How to Store and Reheat Garlicky Chicken With Onions
Refrigerator Storage
Duration: 3-4 days in airtight container
Once cooked and cooled, transfer your Garlicky Chicken With Onions to an airtight glass container or a heavy-duty plastic food storage container. Ensure it’s sealed tightly to prevent odor transfer and keep the chicken moist. While safe to eat for up to 4 days, the optimal quality, especially the texture of the chicken and the vibrancy of the garlic, is best within the first 2-3 days. Over time, the chicken may become slightly drier, and the onions will soften further, integrating more deeply into the sauce. The garlicky flavor will mellow, transforming into a more rounded, savory profile, rather than a sharp, fresh burst. Beyond day 4, the quality declines, and the dish may develop an ‘old’ taste, though still safe if stored properly.
Freezer Storage
Duration: 2-3 months
For longer storage, Garlicky Chicken With Onions freezes quite well. Allow the dish to cool completely before freezing. For best results, portion the chicken and onions into individual servings in freezer-safe airtight containers or heavy-duty freezer bags, pressing out as much air as possible. You can also tightly wrap individual chicken pieces in plastic wrap, then foil, before placing them in a larger freezer bag. This prevents freezer burn and makes thawing easier. To thaw, transfer the frozen chicken to the refrigerator and let it thaw overnight (typically 8-12 hours for a single serving, longer for larger batches). Texture changes to expect include the chicken becoming slightly firmer or drier, and the onions becoming very soft and almost melded into the sauce. The garlic flavor may also become milder. The sauce may thin slightly upon thawing, but can be thickened during reheating.
Reheating Instructions
- Oven (Recommended):Preheat oven to 350°F. Place chicken and onions in an oven-safe dish, adding a splash of chicken broth or water to prevent drying. Cover tightly with foil and bake for 15-20 minutes, or until bubbling gently around the edges and an internal temperature of 165°F is reached. This method works best for retaining moisture and even heating, making it ideal for maintaining the dish’s quality.
- Stovetop (Excellent):Transfer chicken and onions to a skillet or pot over medium-low heat. Add 1-2 tablespoons of water or broth. Cover and cook for 7-10 minutes, stirring occasionally, until heated through and simmering. This method is excellent for smaller portions and allows for better control over moisture, preventing the chicken from drying out.
- Microwave (Acceptable):Place a single serving in a microwave-safe dish. Add a tablespoon of water or broth and cover loosely. Heat on high for 2-3 minutes, stirring halfway through, until steaming hot. While the quickest option, the microwave can sometimes make the chicken rubbery and the onions overly soft. Use this method when time is of the essence, but be mindful of potential texture changes.
Make-Ahead Tips
Garlicky Chicken With Onions is an excellent candidate for make-ahead meal prep. You can significantly reduce cooking time by preparing certain components in advance. Chop all your onions and garlic up to 2 days ahead of time and store them separately in airtight containers in the refrigerator. The chicken can also be marinated with its seasonings (excluding the onions, to prevent them from becoming too watery or overly soft) for up to 24 hours in the refrigerator. This allows the flavors to meld beautifully and tenderizes the chicken. On the day of cooking, simply combine the prepped ingredients and follow your recipe, making the entire cooking process much faster and more enjoyable.