Unlock Tender Bites: Mastering the Art of Slicing Meat Against the Grain
Achieve perfectly tender, easy-to-chew meat every time by mastering the simple technique of slicing against the grain.
This fundamental carving technique ensures optimal texture for any roast or steak, significantly improving the eating experience with precise cuts.
Apply this method to beef brisket, flank steak, prime rib, or any cut where tenderness is paramount.
Understanding the muscle fibers and their direction is the first step to a successful slice. Cutting with the grain leaves long, intact fibers that make meat tough and stringy. Conversely, slicing against the grain shortens these fibers, resulting in a significantly more tender bite. Proper execution involves using a sharp knife, a stable cutting board, and correctly identifying the fiber direction. This guide will walk you through the precise steps to prepare and slice various meat cuts for maximum tenderness and presentation.
How To Slice Meat Against The Grain
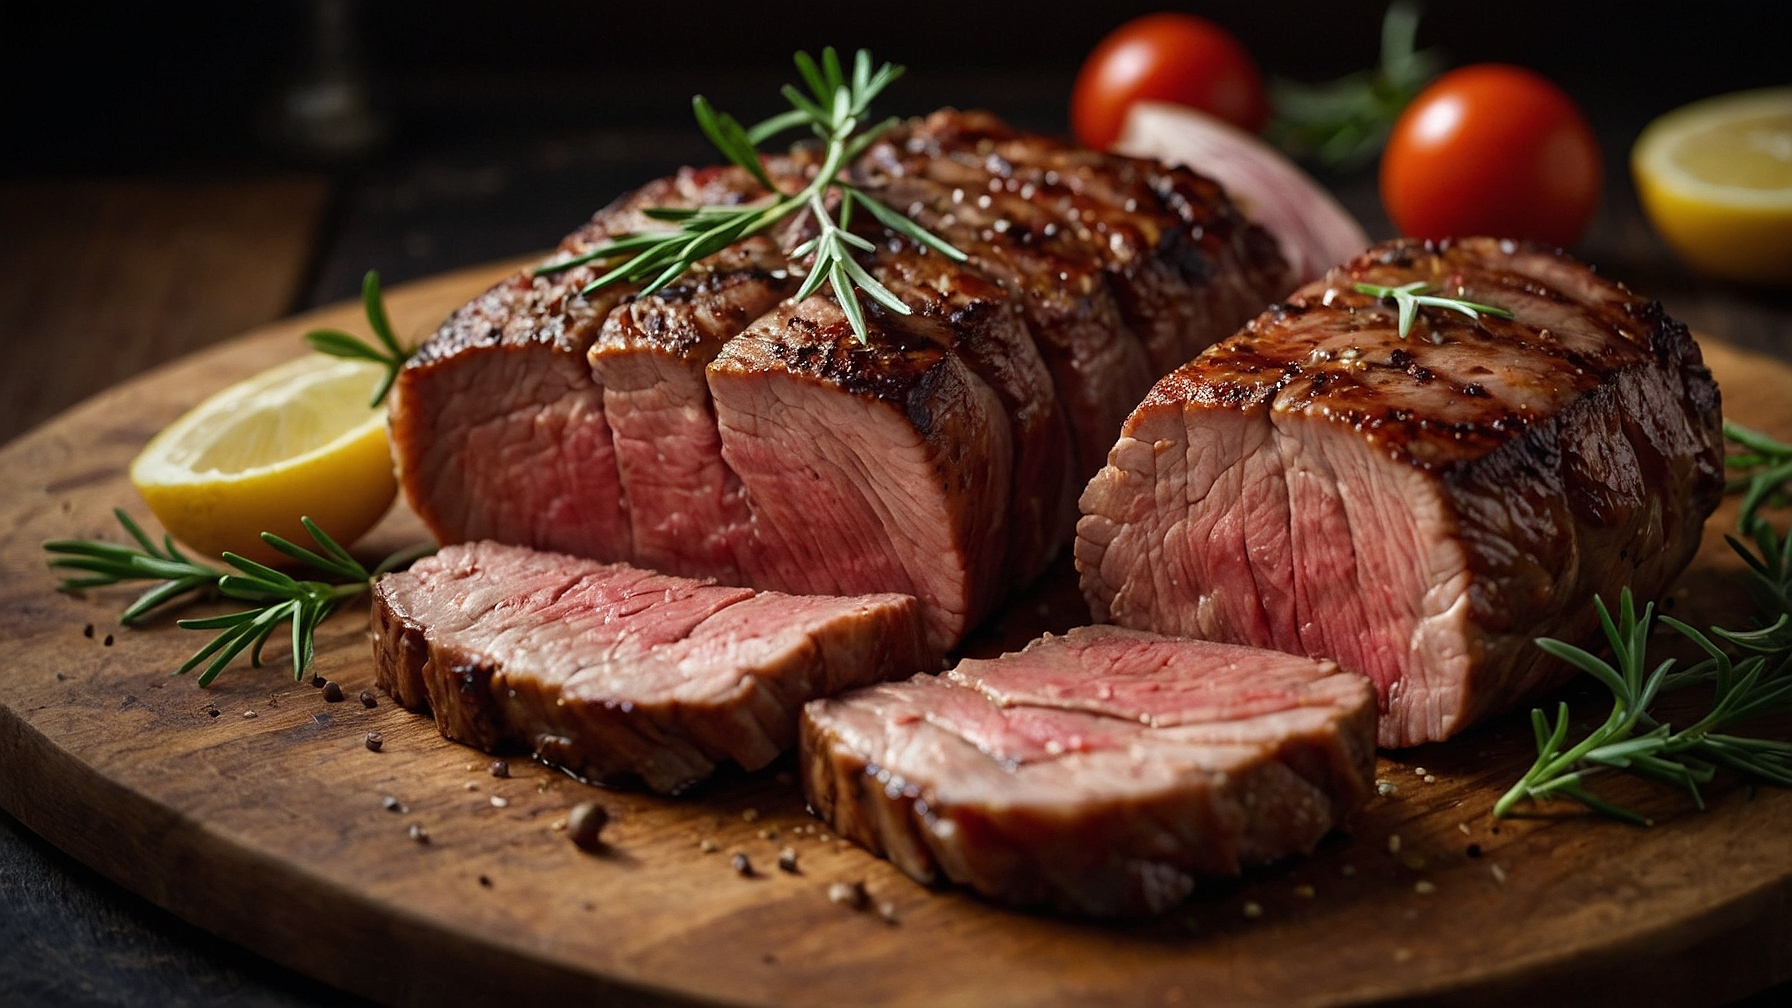
Guide to identifying grain and slicing cooked meat for maximum tenderness. Includes tools, materials, and steps.
Ingredients (Tools & Materials)
- 1 cooked, rested cut of meat (e.g., roast beef, brisket, flank steak, pork loin, turkey breast)
- 1 sharp carving knife or slicing knife, 8-12 inch (20-30 cm) blade, honed and sharpened
- 1 large cutting board, stable and secure (e.g., wood or composite with rubber feet)
- 1 clean, damp kitchen towel
- Optional: 1 sturdy meat fork or carving tongs
Instructions
- Rest cooked meat, tented loosely with aluminum foil, for 10-20 minutes (for cuts under 1 lb / 450g) or 20-30 minutes (for cuts over 1 lb / 450g) until juices redistribute.
- Clear a 2×2 ft (60×60 cm) workspace. Place the large cutting board on a damp kitchen towel to prevent sliding. Confirm carving or slicing knife is sharp.
- Identify meat’s muscle fibers (the grain), appearing as parallel lines. If lines are unclear, run a finger across: smooth indicates with grain, bumpy indicates against grain.
- Position meat on the cutting board with grain parallel to the board edge. If using, secure meat with a meat fork or carving tongs, inserting into a bone or an unsliced portion.
- Position sharp knife perpendicular to the grain. Cut across fibers at a 90-degree angle. For tougher cuts, use a 45-60 degree angle against the grain. Slice using long, smooth strokes. Achieve 1/4-1/2 inch (6-12 mm) slice thickness.
- Slice Specific Cuts:
- Brisket has two parts: flat and point. Identify distinct grain for each. Separate point from flat. Slice each section against its respective grain at a 45-degree angle, until uniform slices are cut.
- Lay flank or skirt steak on board with grain running horizontally. Slice against grain at a 45-60 degree angle. Cut 1/4 inch (6 mm) thick slices until the entire steak is portioned.
- Position roast beef (e.g., prime rib, sirloin) to slice directly across the grain. Use a long carving knife to cut 1/4-1/2 inch (6-12 mm) thick slices until portioned.
- Identify muscle fibers (grain) on pork loin/tenderloin. Slice directly across fibers. Cut 1/2 inch (12 mm) thick slices until portioned.
- For roasted chicken or turkey breast, locate breast muscle. Slice across widest part, perpendicular to muscle fibers. Cut 1/4-1/2 inch (6-12 mm) thick slices until breast is carved.
- Arrange sliced meat on a platter. Serve immediately. Sliced meat will show short muscle fibers in cross-section.
Pro Tips for Perfectly Sliced Meat Every Time
Ingredient Tips
- Chill Cooked Meat Before Slicing:Allow large roasts (like beef tenderloin or pork loin) to rest for 15-20 minutes at room temperature post-cooking, then refrigerate for an additional 30-45 minutes. This firms up muscle fibers, preventing tearing and creating pristine, smooth slices when cut against the grain.
- Trim Excess Fat and Silver Skin:Before cooking, meticulously trim any thick pockets of hard fat or silver skin, leaving a uniform 1/8-inch fat cap where desired. This ensures your slicing knife doesn’t snag on tough, fibrous material, resulting in cleaner passes and preventing the meat from tearing irregularly as you slice against the grain.
- Identify the Grain Direction Precisely:Before making your first cut, spend 10-15 seconds visually inspecting the meat’s surface for parallel lines of muscle fibers. These lines represent the grain; aim to cut perpendicular to these lines, at a 90-degree angle, to shorten the fibers and tenderize each 1/4-inch slice.
Technique Tips
- Sharpen Your Slicing Knife:Always begin with a freshly sharpened 10-12 inch carving or chef’s knife. Use a honing steel at a 20-degree angle for 5-7 strokes per side immediately before slicing. A razor-sharp edge is paramount for cleanly severing muscle fibers against the grain, preventing “sawing” that tears and frays the meat, producing smooth, intact slices.
- Maintain a Consistent Slicing Angle:Position your knife blade at a 45-degree angle to the cutting board, ensuring it is perpendicular to the muscle fibers identified. This diagonal cut maximizes the surface area of each 1/4-inch slice, further shortening tough muscle fibers and enhancing tenderness, especially critical for lean cuts like skirt or flank steak.
- Use a Single, Smooth Sawing Motion:Instead of pressing straight down, employ a gentle back-and-forth sawing motion across the entire 10-inch length of the blade to cut through the meat. Apply only light downward pressure, allowing the sharp edge to do the work. This technique creates uniform 1/8-inch to 1/4-inch thick slices without crushing the delicate muscle structure, preserving juiciness.
- Stabilize the Meat Securely:Use a carving fork or the flat of your non-dominant hand (fingers curled back for safety) to hold the roast firmly in place against the cutting board. Apply gentle downward pressure to prevent the meat from shifting by more than 1/2 inch during each slice. This stability ensures consistent slice thickness, typically 1/4-inch for roasts, and precise cuts against the grain.
- Adjust Slice Thickness for Tenderness:For tougher cuts like brisket or chuck roast, aim for ultra-thin slices, approximately 1/8-inch thick, to maximize tenderness when cut against the grain. For naturally tender cuts like pork loin or beef tenderloin, slices can be slightly thicker, around 1/4-inch, as their muscle fibers are already more delicate.
Common Issues
- Meat Shreds Instead of Slices Cleanly:This indicates a dull knife or incorrect slicing angle. Immediately sharpen your knife, aiming for an edge that can effortlessly slice a paper-thin piece of paper. Re-evaluate your cut; ensure your knife is at a true 90-degree angle to the grain, not just close, producing clean, separated 1/4-inch slices.
- Slices Are Unevenly Thick:Uneven slices often stem from inconsistent pressure or an unsteady hand. Focus on keeping your non-dominant hand firmly stabilizing the meat, preventing any shift greater than 1/4 inch between cuts. Maintain a constant angle with your slicing knife, aiming for a uniform 1/8-inch to 1/4-inch thickness across the entire cut, visualizing the parallel plane.
- Sliced Meat Still Feels Tough:The primary culprit is often slicing with, or at a shallow angle to, the grain. Before the next cut, take 5-10 seconds to re-examine the meat’s grain. Rotate the meat 90 degrees if necessary to ensure your knife is cutting perpendicular to the longest muscle fibers. This shortens the fibers, ensuring each 1/4-inch slice is noticeably more tender.
- Difficulty Finding the Grain in Cooked Meat:The grain can be less obvious in cooked meat. Look for subtle lines or striations of muscle that run parallel. If still unsure, cut a small 1-inch test piece against what you believe is the grain, and then another small 1-inch piece 90 degrees from that. The one that pulls apart more easily indicates you’ve correctly identified “against the grain,” guiding your full 90-degree cuts.
Common Slicing Mistakes to Avoid for Maximum Tenderness
Common Mistakes
- Slicing With the Grain:
- This fundamental error makes meat stringy and chewy by leaving muscle fibers unbroken. Exact fix: Before cutting, always locate the parallel lines (muscle fibers) through the meat. Orient your cut so these fibers are perpendicular to your knife’s path. For cuts with varying muscle groups, like brisket, adjust your orientation as you slice, identifying the grain for each section. On cooked meats, look for subtle, often darker, striations indicating fiber direction.
- Using a Dull Knife:
- A dull blade tears and crushes muscle fibers, resulting in ragged, less tender slices and requiring excessive force. Exact fix: Begin with a razor-sharp knife. Use a ceramic honing rod to realign the blade’s edge with 5-10 gentle strokes per side at a 20-degree angle before each use. Sharpness is confirmed when the blade glides effortlessly through a ripe tomato skin without downward pressure, ensuring clean cuts that preserve texture.
- Sawing Motion & Inconsistent Thickness:
- Aggressive back-and-forth sawing damages fibers, producing uneven, less appetizing slices. Often due to a dull knife or improper technique. Exact fix: Employ a single, long, smooth stroke for each slice, drawing the knife towards or pushing it away, using its full length. Avoid short, jerky motions. For optimal tenderness, aim for slices consistently between 1/8 and 1/4 inch thick. Visualize this thickness before committing to the cut, ensuring uniformity as the slice separates.
Key Techniques
- Accurately Identifying the Grain:
- This is crucial for maximum tenderness. Step-by-step:
- 1. Place cooked meat on your cutting board.
- 2. Examine the surface for visible, parallel lines or striations, resembling wood grain.
- 3. Rotate the meat so these fibers run perpendicular to your knife’s path.
- 4. For irregular cuts like brisket, the grain can shift; continuously adjust your cutting angle, often at a 45-degree angle to the visible grain, for optimal shortness of fibers.
- Employing the Right Tools and Angle:
- Correct tools and angles ensure clean, consistent slices. Step-by-step:
- 1. Knife Choice: Use a long (10-12 inches), thin slicing or carving knife with a very sharp, straight edge. Its length facilitates a single, sweeping stroke.
- 2. Angle to the Grain: Position your knife directly perpendicular (90 degrees) to the muscle fibers. Essential for tender results.
- 3. Angle to the Board: For thinner, more tender slices from leaner cuts, hold your knife at a slight angle (approximately 15-30 degrees) relative to the cutting board. This creates wider, more delicate pieces that look slightly fanned out when served.
- Consistent and Controlled Slicing Motion:
- Smooth, deliberate motions prevent tearing and ensure uniform slices. Step-by-step:
- 1. Stabilize: Gently hold the meat with a carving fork or your non-dominant hand, applying minimal pressure to steady it without crushing, ensuring no lumps remain.
- 2. Initiate Cut: Place the heel of your sharp knife at the far edge of the meat.
- 3. Execute Stroke: In one fluid motion, draw the knife towards you, using the entire blade length. Let the knife’s sharpness do the work; minimal downward pressure is required. The cut surface should appear clean, almost glossy, and free from tearing.
- 4. Repeat: Lift the knife, reposition it, and repeat the long, smooth stroke, consistently aiming for that 1/8 to 1/4 inch thickness.