Mini Chocolate Chip Banana Bread: The Perfect Bite-Sized Treat
These Mini Chocolate Chip Banana Breads are perfect for quick grab-and-go treats, baking in a fraction of the time a full loaf requires.
Each mini loaf bakes to golden perfection in just 18-22 minutes and uses 9 common pantry ingredients.
Prepare a batch for convenient breakfast options, lunchbox additions, or an easy afternoon snack.
Mini Chocolate Chip Banana Bread
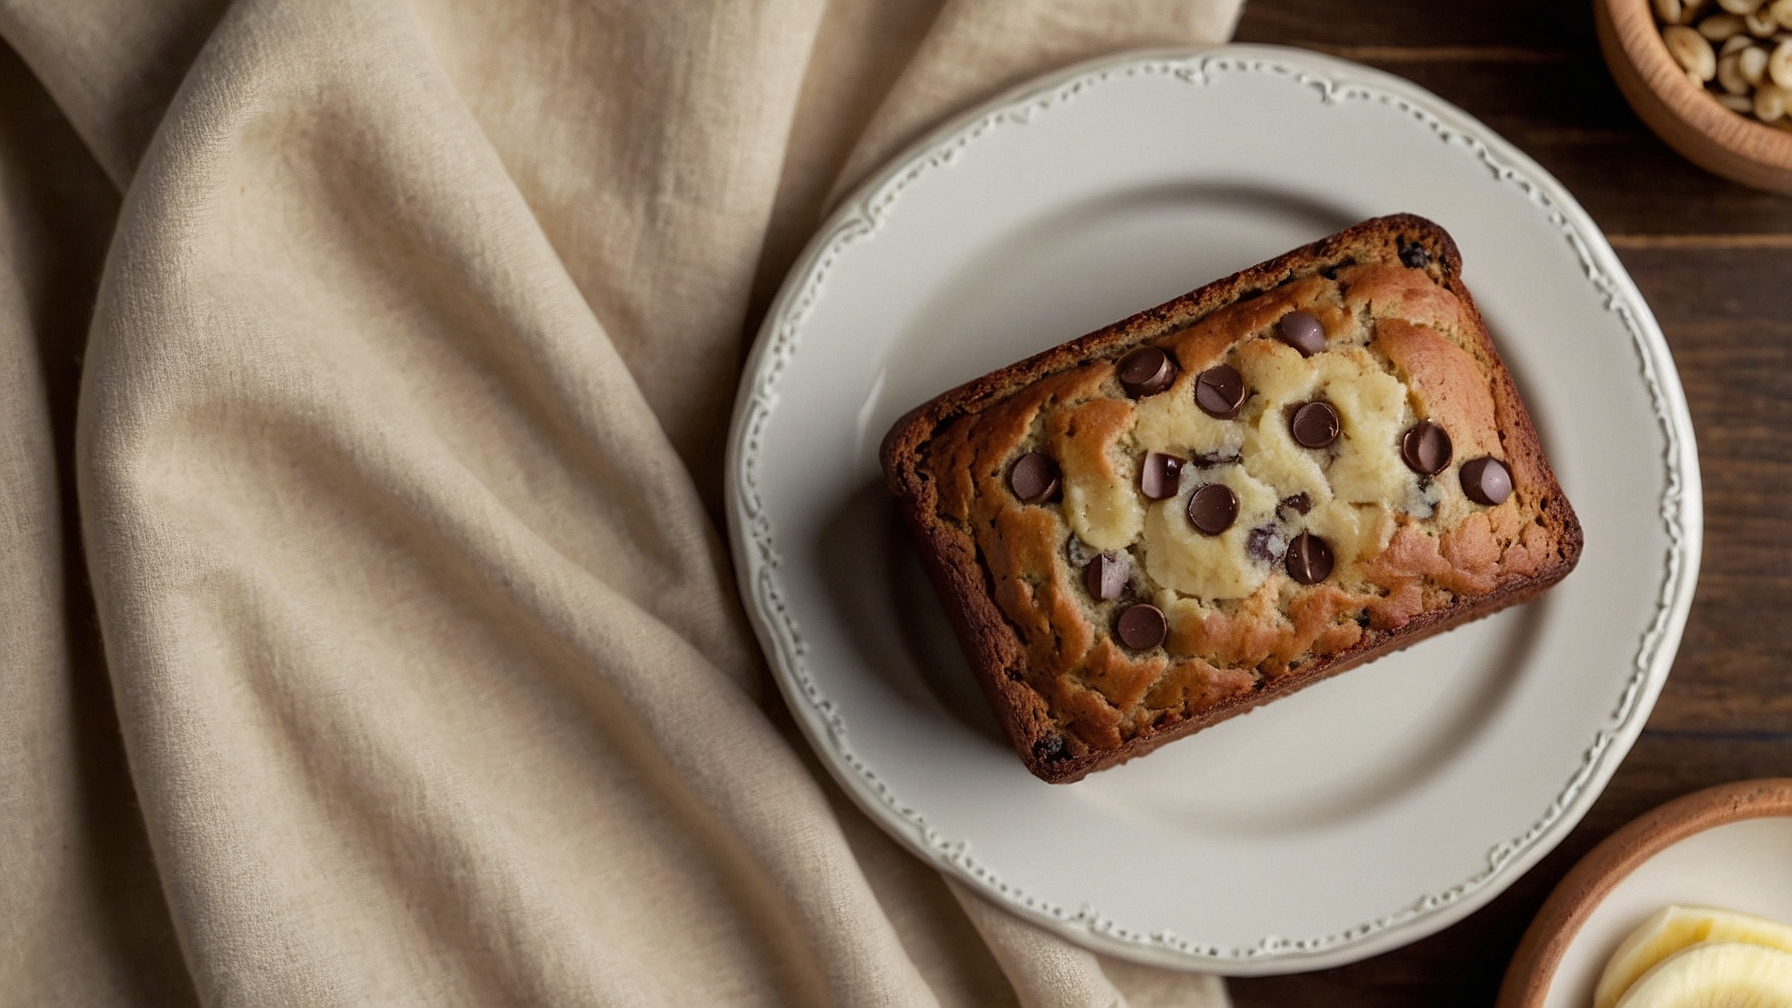
These mini loaves offer a moist, sweet treat with ripe banana flavor and chocolate chips.
Ingredients
- 1 ¾ cups (210g) all-purpose flour, spooned and leveled
- ½ cup (100g) granulated sugar
- 1 teaspoon (5g) baking soda
- ½ teaspoon (2.5g) fine sea salt
- ¼ teaspoon (0.5g) ground cinnamon, optional
- 3 large (approx. 1 cup / 240g) very ripe bananas, peeled and thoroughly mashed
- 2 large eggs, at room temperature, lightly beaten
- ½ cup (113g) unsalted butter, melted and cooled
- 1 teaspoon (5ml) pure vanilla extract
- ¼ cup (60g) full-fat sour cream or plain Greek yogurt, at room temperature
- 1 cup (170g) semi-sweet chocolate chips, divided
Instructions
- Preheat oven to 350°F (175°C). Grease and lightly flour a 12-cavity mini loaf pan (each cavity approx. 3.5 x 2 inches). Alternatively, line a 24-cavity mini muffin pan with paper liners.
- In a large mixing bowl, whisk together the all-purpose flour, granulated sugar, baking soda, fine sea salt, and ground cinnamon (if using) for 30 seconds until uniformly combined.
- In a separate medium bowl, mash the 3 large (1 cup / 240g) very ripe bananas with a fork or potato masher until mostly smooth with a few small lumps.
- To the mashed bananas, add the 2 lightly beaten large eggs, ½ cup (113g) melted and cooled unsalted butter, 1 teaspoon (5ml) pure vanilla extract, and ¼ cup (60g) room-temperature full-fat sour cream or plain Greek yogurt. Whisk the mixture for 1 minute until thoroughly combined.
- Pour the wet banana mixture into the dry ingredients bowl. Stir gently with a rubber spatula or wooden spoon for 30-45 seconds until no streaks of flour remain and the batter is moistened. Avoid overmixing.
- Gently fold in ¾ cup (127g) of the semi-sweet chocolate chips into the batter for 15-20 seconds until evenly distributed. Reserve the remaining ¼ cup of chocolate chips for topping.
- Divide the batter evenly among the prepared mini loaf pan cavities, filling each about two-thirds full. Sprinkle the remaining ¼ cup (43g) of chocolate chips over the tops of the batter in each cavity.
- Bake for 25-30 minutes for mini loaves, or 15-18 minutes for mini muffins, in the preheated 350°F (175°C) oven. The bread is done when a wooden skewer or toothpick inserted into the center comes out clean or with moist crumbs attached, and tops are golden brown and slightly firm.
- Remove the pan from the oven. Cool the mini banana breads in the pan for 10-15 minutes on a wire rack. Carefully invert the pan to release the mini loaves and place them directly on the wire rack to cool completely for at least 30 minutes before serving.
Notes
- Use very ripe bananas with abundant brown or black spots on their peels. If bananas are not ripe, accelerate ripening: place on a baking sheet and bake at 300°F (150°C) for 15-30 minutes until peels turn completely black and shiny.
- Store fully cooled mini banana breads in an airtight container at room temperature for up to 3 days. Refrigerate for up to 1 week. To freeze, wrap individual mini loaves tightly in plastic wrap, then an additional layer of aluminum foil. Store in the freezer for up to 3 months. Thaw at room temperature for a few hours or warm gently before enjoying.
- Incorporate ½ cup (60g) chopped walnuts or pecans into the batter with the chocolate chips. Add an additional ½ teaspoon (1g) ground nutmeg or ¼ teaspoon ground cloves to the dry ingredients. Experiment with different chocolate types: milk chocolate chips, dark chocolate chunks, or white chocolate chips. Fold in ½ cup (75g) dried cranberries, blueberries, or finely chopped dried apricots.
- Use the “spoon and level” method when measuring flour: gently spoon the flour into your measuring cup until it overflows, then level it off with a straight edge (e.g., a knife). Do not scoop directly from the bag; this compacts the flour, leading to over-measurement.
Pro Tips for Perfect Mini Chocolate Chip Banana Bread
Ingredient Tips
- Banana Ripeness & Mashing:Select bananas with at least 80% black or brown spots on their peels; this indicates peak sweetness, usually achieved 5-7 days after turning yellow. Mash them with a fork until mostly smooth but with a few small, 1/4-inch lumps remaining, aiming for exactly 1 cup (225g) of mashed banana for optimal moisture and texture.
- Quick-Ripen Bananas:If your bananas aren’t ripe enough, bake them unpeeled on a baking sheet at 300°F (150°C) for 15-20 minutes until their skins are completely blackened and the bananas feel soft when gently squeezed. Allow them to cool for 10 minutes before peeling and mashing, yielding naturally sweet bananas ready for baking.
- Butter Temperature:Ensure unsalted butter is at true room temperature, between 68-72°F (20-22°C), for proper creaming. It should indent easily when pressed with a finger, not be oily. Cream it with sugar for a full 2-3 minutes until the mixture is visibly lightened in color and fluffy, incorporating sufficient air for a tender crumb.
- Accurate Flour Measurement:Always spoon flour into your measuring cup until it overflows, then level it off with the straight edge of a knife. This method ensures you add the correct amount, typically around 4.5 ounces (127g) per cup, preventing a dense or dry bread from too much flour.
- Chocolate Chip Selection & Prep:Opt for mini chocolate chips (approximately 0.25 inches / 6mm) for better distribution throughout the mini loaves. Before adding them to the batter, toss your 3/4 cup (130g) of chips with 1 tablespoon of the reserved dry flour mixture; this light coating helps prevent them from sinking to the bottom during baking.
Technique Tips
- Gentle Batter Mixing:After combining wet and dry ingredients, mix them using a spatula with no more than 15-20 gentle folds. Stop mixing when only a few streaks of flour are still visible; overmixing develops gluten, resulting in a tough and chewy bread instead of tender.
- Proper Pan Preparation & Filling:Thoroughly grease your mini loaf pans with a non-stick cooking spray, ensuring every corner is coated. Lightly dust each cavity with 1 tablespoon of flour, tapping out any excess. Fill each pan only to 2/3 full (about 1/2 cup of batter, depending on pan size) to allow for a proper, domed rise without overflowing.
- Verifying Oven Temperature:Preheat your oven to 350°F (175°C) for at least 15-20 minutes before placing your pans inside. Use an oven thermometer to confirm the internal temperature; inaccurate oven temperatures can lead to underbaked centers or overly dry edges.
- Precise Baking Time:Bake mini loaves for 20-25 minutes. To check for doneness, insert a wooden skewer or toothpick into the center of a loaf; it should emerge with moist crumbs attached, not wet batter. The tops should be beautifully golden brown.
- Controlled Cooling Process:Allow the mini loaves to cool in their pans on a wire rack for 10-15 minutes. This crucial resting period lets them firm up, preventing breakage when you unmold them. After this, carefully remove them and cool completely on the wire rack for at least 30-45 minutes before slicing, which prevents a gummy texture from trapped steam.
Common Issues
- Dry or Crumbly Bread:Ensure you are using very ripe bananas (at least 80% black peel) and precisely 1 cup (225g) of mashed banana for sufficient moisture. Verify flour measurement by spooning and leveling, as adding just 1/4 cup too much flour (approx. 1 oz / 28g) can significantly dry out the bread. Reduce baking time by 2-3 minutes if your oven tends to run hot.
- Chocolate Chips Sinking:To prevent your 3/4 cup (130g) of mini chocolate chips from settling at the bottom, toss them with 1-2 tablespoons of the dry flour mixture before folding them into the batter. This light flour coating provides friction, allowing them to suspend more evenly throughout the loaves during baking.
- Gummy or Dense Texture:Avoid overmixing the batter at all costs; incorporate wet and dry ingredients with only 15-20 gentle folds until just combined. Overmixing overdevelops gluten, leading to a tough, gummy texture. Also, ensure bananas are well-mashed to 1/4-inch lumps but not pureed, which can release too much liquid and affect the crumb structure.
- Loaves Not Rising Properly:First, check the freshness of your baking soda by mixing 1/4 teaspoon with 1 tablespoon of white vinegar; it should bubble vigorously. If not, replace it. Additionally, verify your oven temperature with a thermometer to ensure it’s accurately maintaining 350°F (175°C), as too low a temperature can prevent proper leavening.
- Sticking to the Pans:Thoroughly grease your mini loaf pans with solid shortening or non-stick spray, ensuring full coverage, then dust with 1 tablespoon of flour, tapping out any excess. After baking, allow the loaves to cool in their pans on a wire rack for a full 10-15 minutes before attempting to unmold them, letting them firm up sufficiently.
How to Store and Reheat Mini Chocolate Chip Banana Bread
Mini Chocolate Chip Banana Bread is a delightful treat, perfect for breakfast, snacks, or dessert. To ensure every bite is as delicious as the first, proper storage and reheating are key. Follow these guidelines to keep your mini loaves fresh, moist, and ready to enjoy.
Refrigerator Storage
Duration: 5-7 days in an airtight container
For optimal freshness, store your cooled mini banana bread loaves in an airtight glass or food-safe plastic container. This prevents them from drying out and absorbing any unwanted odors from the refrigerator. While the bread remains moist for the first 3-4 days, you may notice a slight decrease in overall moistness and a subtle firming of the chocolate chips after this period. The banana flavor will deepen slightly initially, but can start to dull after day 5. To help absorb any excess condensation and maintain texture, you can place a piece of paper towel at the bottom of the container.
Freezer Storage
Duration: 2-3 months
Freezing is an excellent way to preserve mini banana bread for longer periods. Ensure the loaves are completely cooled before freezing to prevent condensation and ice crystals. Wrap each mini loaf individually first in plastic wrap, then in a layer of aluminum foil. This double layer is crucial for preventing freezer burn and preserving moisture. Alternatively, you can place the individually wrapped loaves into a heavy-duty freezer bag. When ready to enjoy, thaw individual loaves at room temperature for 1-2 hours, or in the refrigerator for 3-4 hours (or overnight). You might notice a slightly denser texture upon thawing, but the moisture content is largely retained. Occasionally, the chocolate chips might develop a slight whitish film (bloom), which is harmless and doesn’t affect flavor.
Reheating Instructions
- Oven/Toaster Oven:Preheat to 300°F. Reheat thawed loaves for 8-12 minutes, or frozen loaves (wrapped in foil to prevent drying) for 15-20 minutes. Look for the bread to be warm through, with the edges slightly crisp and the chocolate chips melted and gooey. This method is highly recommended for achieving the best texture and flavor, mimicking freshly baked.
- Microwave:Place a single mini loaf on a microwave-safe plate. Heat thawed loaves on high for 15-30 seconds, or frozen loaves for 45-60 seconds, checking halfway through. The bread should be warm to the touch and the chocolate soft. This is the quickest method, but can lead to a slightly chewier, sometimes rubbery texture if overdone. Best for immediate consumption.
- Air Fryer:Preheat to 300°F. Reheat thawed loaves for 3-5 minutes. The exterior will become lightly crisp, while the interior remains moist and warm. This method is excellent for achieving a delightful textural contrast.
Make-Ahead Tips
Preparing components in advance can streamline your baking process. You can mix dry ingredients (flour, baking soda, salt, cinnamon, etc.) and store them in an airtight container at room temperature for up to 3 months. Wet ingredients, such as mashed bananas (which will brown but are perfectly fine for baking), eggs, sugar, oil, and vanilla, can be combined and refrigerated in a sealed container for up to 24 hours. The full batter can also be made up to 2 days in advance and stored in the refrigerator; however, stir gently before baking as the leavening agents may have begun to react, potentially leading to a slightly denser crumb if it sits too long. For ultimate convenience, bake and freeze the mini loaves as described above, ensuring a stash of homemade goodness is always at the ready.