Roasted Autumn Vegetable Pot Pies: Comfort in Every Bite
These Roasted Autumn Vegetable Pot Pies transform seasonal produce into a comforting, single-serving meal with minimal active cooking time, offering a flavorful vegetarian option.
Active preparation for these individual pot pies is under 30 minutes, thanks to a simple roasting technique that deepens the vegetables’ natural sweetness and savory notes.
The recipe utilizes classic autumn root vegetables like butternut squash, parsnips, and carrots, enveloped in a rich, herb-infused gravy.
Each pie is crowned with a golden, flaky pastry crust, ensuring a satisfying texture in every bite. This makes them an excellent choice for a hearty weeknight dinner or an impressive dish for autumn entertaining.
Roasted Autumn Vegetable Pot Pies
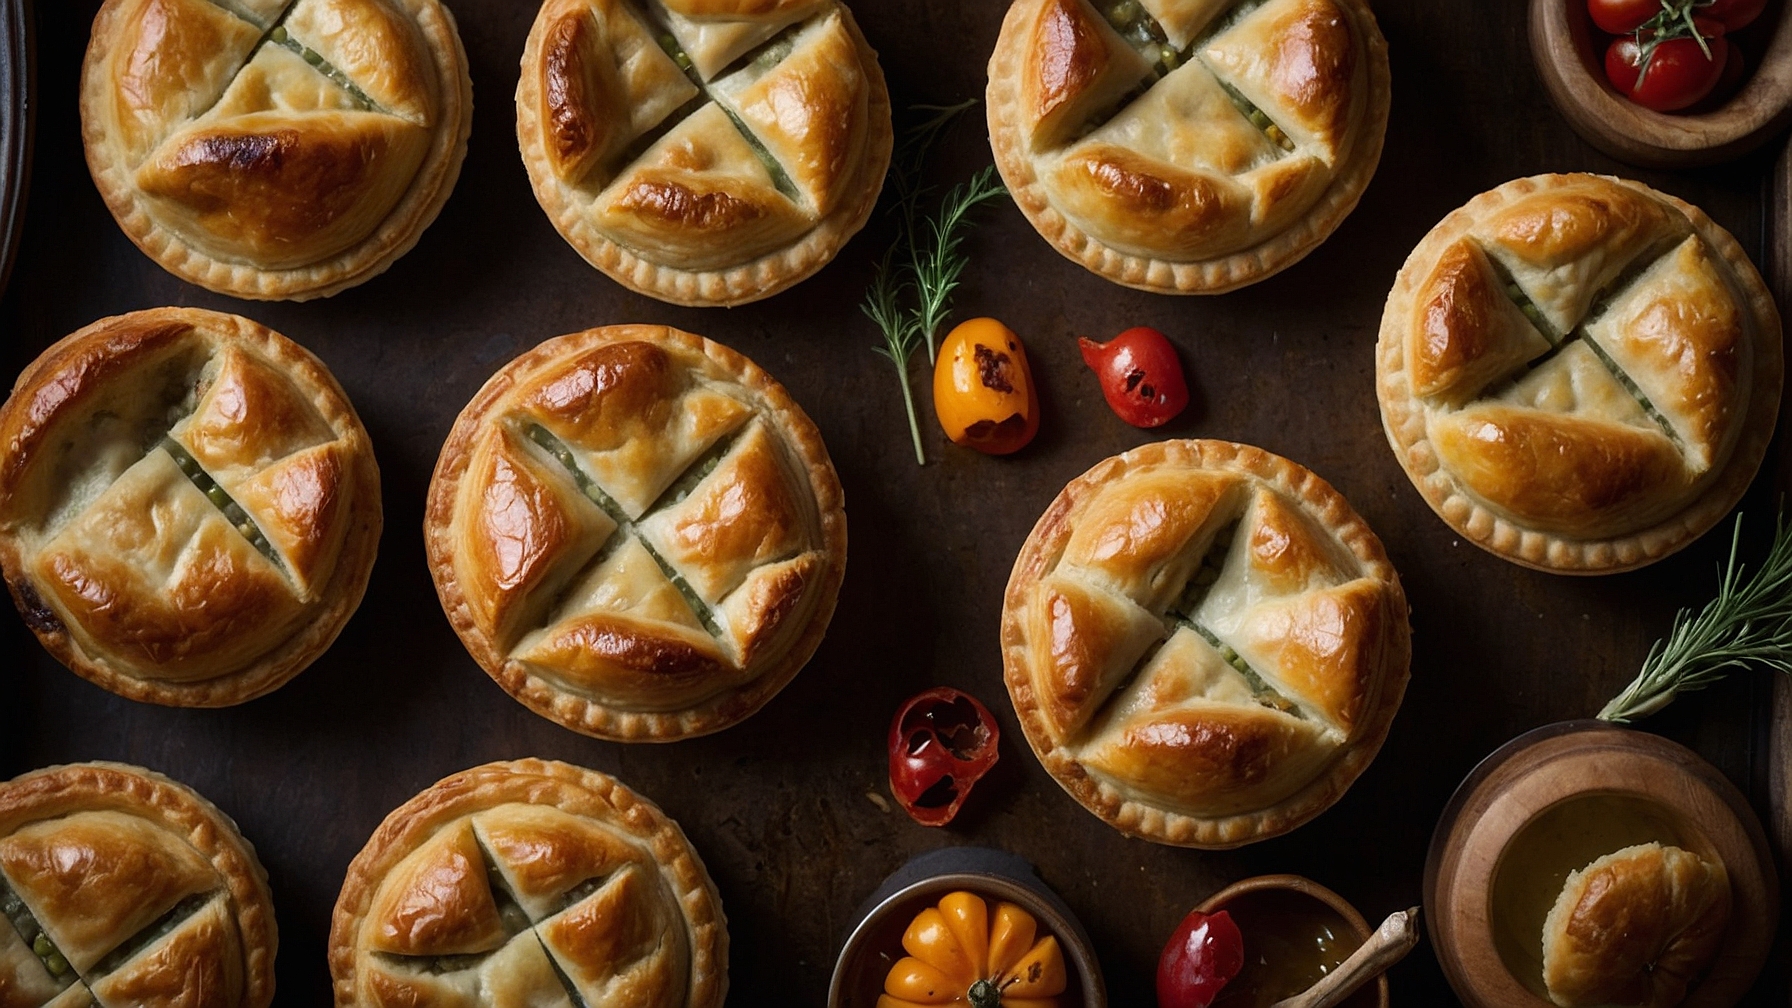
Pot pies contain roasted root vegetables and herbs under a flaky puff pastry crust.
Ingredients
- For Roasted Vegetables:
- 1 medium (1.2 kg) butternut squash, peeled, seeded, cut into 1-inch (2.5 cm) cubes
- 2 large (300g) carrots, peeled, cut into 1/2-inch (1.3 cm) thick rounds
- 2 medium (200g) parsnips, peeled, cut into 1/2-inch (1.3 cm) thick rounds
- 1 large (200g) Yukon Gold potato, peeled, cut into 1-inch (2.5 cm) cubes
- 1 medium (150g) red onion, cut into 1-inch (2.5 cm) wedges
- 3 cloves (15g) garlic, peeled, smashed
- 2 tbsp (30ml) olive oil
- 1 tsp (5g) dried thyme leaves
- 1/2 tsp (2.5g) dried rosemary, crushed
- 1/2 tsp (2.5g) salt
- 1/4 tsp (1.25g) black pepper, freshly ground
- For Pot Pie Filling:
- 4 tbsp (56g) unsalted butter
- 1/4 cup (30g) all-purpose flour
- 2 cups (480ml) vegetable broth, warm
- 1 cup (240ml) whole milk or half-and-half, warm
- 1/2 cup (120ml) heavy cream, optional
- 1 tsp (5g) salt, adjust as needed
- 1/2 tsp (2.5g) black pepper, freshly ground, adjust as needed
- 1/4 cup (60g) fresh parsley, chopped
- For Assembly:
- 1 sheet (approx. 250g) frozen puff pastry, thawed
- 1 large egg, beaten (for egg wash)
- 1 tbsp (15ml) water (for egg wash)
Instructions
- Preheat oven to 400°F (200°C). Combine butternut squash, carrots, parsnips, potato, red onion, and smashed garlic cloves in a large bowl. Drizzle with olive oil. Sprinkle with dried thyme, crushed rosemary, salt, and black pepper; toss until vegetables coat evenly.
- Spread seasoned vegetables in a single layer across two baking sheets. Roast 25-30 minutes at 400°F (200°C), flipping halfway through, until tender-crisp with light caramelization on edges. Remove from oven; set aside.
- Melt unsalted butter in a large saucepan over medium heat. Add all-purpose flour; whisk continuously 1-2 minutes until a light golden roux forms and emits a nutty aroma.
- Gradually whisk warm vegetable broth into roux until smooth. Slowly whisk warm whole milk (and heavy cream, if using) until sauce combines and becomes creamy. Bring to a gentle simmer, stirring frequently; cook 5-7 minutes until sauce thickens and generously coats a spoon. Add 1 tsp (5g) salt and 1/2 tsp (2.5g) black pepper; adjust as needed. Remove from heat.
- Fold roasted vegetables and chopped parsley into thickened sauce until evenly distributed.
- Reduce oven to 375°F (190°C). Divide hot vegetable filling evenly among four 10-ounce (295ml) oven-safe ramekins (or one 9-inch / 23 cm pie dish). On a lightly floured surface, unroll thawed puff pastry. Roll pastry slightly larger than ramekin tops or pie dish. Cut four pastry circles 1/2 inch (1.3 cm) wider than ramekin openings (or one large circle for pie dish).
- Place one pastry circle over each filled ramekin; press firmly around edges to seal pastry. For a large pie, place pastry over pie dish; crimp edges. Whisk beaten egg with 1 tbsp (15ml) water for egg wash. Brush pastry tops with egg wash for a golden-brown finish. Make 2-3 small slits in pastry centers for steam release. Bake 20-25 minutes (individual pies) or 30-35 minutes (large pie) at 375°F (190°C) until pastry puffs, becomes golden brown, and filling bubbles.
- Remove baked pot pies from oven. Rest 5-10 minutes before serving to allow filling to set.
Notes
- Roasting Tip: Spread vegetables in a single layer on baking sheets to ensure caramelization. Use an additional baking sheet if needed to prevent overcrowding.
- Puff Pastry Handling: Keep puff pastry chilled until use. If pastry becomes warm and sticky, return to refrigerator for 10-15 minutes to firm.
- Make Ahead Option: Prepare roasted vegetable and sauce filling up to 2 days in advance. Store in an airtight container in refrigerator. Reheat before assembling and baking pies.
- Crust Variations: Substitute puff pastry with a homemade pie crust. For gluten-free, use gluten-free puff pastry or a biscuit crust.
- Vegetable Substitutions: Substitute or add Brussels sprouts, sweet potatoes, turnips, or crimini mushrooms. Adjust roasting times for varying vegetable textures and densities.
Pro Tips for Perfect Roasted Autumn Vegetable Pot Pies
Ingredient Tips
- Roast Vegetables Perfectly:Toss 1.5 lbs mixed autumn vegetables (1-inch dice: butternut squash, sweet potato, carrots) with 2 tbsp olive oil, 1/2 tsp kosher salt; roast 400°F (200°C) for 20-25 minutes, flipping, until caramelized and fork-tender.
- Sauté Mushrooms Separately:Sauté 8 ounces sliced cremini mushrooms in 1 tbsp butter over medium-high heat for 5-7 minutes until deeply golden brown, their liquid evaporated, for meaty, non-soggy texture in the finished filling.
- Clean Leeks Meticulously:Slice 1 large leek (white/light green parts) into 1/4-inch rounds, soak in cold water for 5 minutes, agitating gently; lift out, leaving any grit behind, for clean flavor and texture.
- High-Quality Vegetable Stock:Use 4 cups low-sodium “roasted vegetable” stock for deep umami; this rich base reduces reliance on excess salt and enhances overall flavor considerably.
Technique Tips
- Build a Smooth Roux:Melt 4 tbsp unsalted butter in a large skillet over medium heat, whisk in 1/4 cup all-purpose flour for 1-2 minutes until pale golden and nutty; this ensures a thick, silky sauce that slides off a spoon.
- Deglaze for Depth:After sautéing aromatics, pour in 1/4 cup dry white wine (like Pinot Grigio); scrape the pan bottom with a wooden spoon for 30-60 seconds, evaporating alcohol and releasing concentrated flavor into your sauce.
- Seal and Vent Crust:Trim pastry to a 1-inch overhang around your 9-inch pie dish, crimp edges with a fork to seal securely; cut 3-4 small 1/2-inch slits in the center for steam escape, preventing a ballooned crust.
- Optimal Baking Temperature:Bake at 400°F (200°C) for the first 15 minutes (to encourage pastry lift), then reduce to 375°F (190°C) for an additional 20-25 minutes, until crust is deeply golden brown and filling visibly bubbling at the edges.
Common Issues
- Filling Too Thin:If filling hasn’t thickened after 5-7 minutes simmering, whisk 1 tbsp cornstarch with 2 tbsp cold water; gradually whisk into bubbling filling, cook 1 minute until it visibly thickens to lightly coat a spoon.
- Crust Browning Too Quickly:If crust is golden after 20 minutes but filling not bubbling, tent with aluminum foil for remaining 10-15 minutes of baking; this shields it from direct heat, preventing over-browning.
- Vegetables Not Fork-Tender:Ensure vegetables are fully tender after roasting (20-25 minutes at 400°F/200°C) before adding to filling; if firm, return to oven for 5-7 minutes, as they won’t soften significantly during pie baking.
- Pot Pie Crumbles When Sliced:Allow baked pot pie to rest on a wire rack for a full 10-15 minutes after removing from the oven; this allows the bubbling filling to set, preventing spillage when cutting the first slice.
How to Store, Reheat, and Freeze Your Pot Pies
Refrigerator Storage
Duration: 5-7 days in airtight container
Once cooled completely, transfer individual or whole pot pies to an airtight glass or heavy-duty plastic container. Storing them in the refrigerator helps maintain their freshness. Within the first 2-3 days, the crust will retain most of its flaky texture, though it will soften slightly compared to freshly baked. The rich, savory filling, featuring roasted autumn vegetables like squash, carrots, and parsnips, will meld beautifully and even deepen in flavor. However, after day 5, the crust may become noticeably softer, and the vibrant roasted vegetable flavors might lose some of their initial brightness and a bit of their firm texture. For optimal quality, consume within 3 days.
Freezer Storage
Duration: 2-3 months
For baked pot pies, allow them to cool completely. Wrap each individual pot pie tightly in aluminum foil, then place them in a freezer-safe zip-top bag or an airtight container. This double layer prevents freezer burn. For unbaked pot pies, assemble the pies completely, including the top crust. Wrap each pie securely in plastic wrap, then an additional layer of aluminum foil. Freeze on a flat surface until solid, then transfer to a freezer bag. When ready to enjoy, thaw baked pies overnight in the refrigerator before reheating. Freezing may cause the crust to be slightly less flaky upon reheating, and the roasted vegetables in the filling might become a touch softer or mushier due to ice crystal formation. The sauce can also thin slightly once thawed and reheated.
Reheating Instructions
- Oven (Recommended for Baked Pies):Preheat oven to 350°F. Place individual pot pies on a baking sheet and heat for 20-30 minutes, or a large pie for 40-50 minutes. If the crust begins to brown too quickly, loosely tent it with aluminum foil. Ready when the crust is golden brown and flaky, and the filling is bubbling hot (reaching an internal temperature of 165°F). This method ensures a crispy crust and evenly heated filling.
- Toaster Oven (Good for Individual Servings):Preheat toaster oven to 325°F. Place an individual pot pie directly on the rack or a small baking sheet. Heat for 15-20 minutes, or until the crust is crisp and the filling is thoroughly heated and bubbly. Similar to a full-sized oven, this provides excellent texture.
- Microwave (Acceptable, with Caveats):Transfer an individual pot pie to a microwave-safe plate. Heat on medium power for 2-3 minutes, or until warmed through. Be aware that this method will result in a significantly softer, potentially soggy crust and a very hot filling. The flavors may also be slightly muted compared to oven reheating. Not recommended for a whole pie.
- From Frozen (Unbaked Pies):Preheat oven to 375°F. Place the frozen, unbaked pie on a baking sheet. Bake for 60-75 minutes. Cover loosely with foil for the first 45-50 minutes to prevent over-browning, then remove foil for the last 15-20 minutes to allow the crust to turn golden. The pie is ready when the crust is deeply golden, and the filling is visibly bubbling.
- From Frozen (Baked Pies):Thaw overnight in the refrigerator, then follow the standard oven reheating instructions. Alternatively, to bake directly from frozen, preheat oven to 300°F. Place the frozen pie (unwrapped) on a baking sheet. Bake, covered with foil, for 45-60 minutes, then uncover and bake for an additional 10-15 minutes until the crust is crisp and the filling is hot.
Make-Ahead Tips
You can prepare several components of your pot pies in advance. Roast the autumn vegetables (squash, carrots, parsnips, etc.) and store them in an airtight container in the refrigerator for up to 3 days. The creamy sauce base for the filling can also be made 2-3 days ahead and kept in an airtight container in the fridge. Pie dough can be made up to 3 days in advance and stored as a disk wrapped in plastic in the refrigerator. For ultimate convenience, assemble the entire pot pie (without baking) and freeze it as described in the Freezer Storage section. This allows for a quick, homemade meal straight from the freezer on a busy day.